Overview

The Embedded Wallet Kit provides a straightforward way to create and manage embedded wallets in your React application. EWK offers function abstractions to easily create embedded wallets, derive accounts, import and export wallets and more. Before we start, ensure you’re familiar with the concepts of Wallets and Wallet Accounts.

Creating an embedded wallet

After your user has authenticated, you can create an embedded wallet using the createWallet function from the useTurnkey hook. This will create a new wallet within the end-user’s sub-organization with one Ethereum and one Solana wallet account.
import { useTurnkey } from "@turnkey/react-wallet-kit";

function CreateWalletButton() {
  const { createWallet } = useTurnkey();

  const handleCreateWallet = async () => {
    try {
      const walletId = await createWallet({
        walletName: "My New Wallet",
        accounts: ["ADDRESS_FORMAT_ETHEREUM", "ADDRESS_FORMAT_SOLANA"], // This will create one Ethereum and one Solana account within the wallet
      });
      console.log("Wallet created:", walletId);
    } catch (error) {
      console.error("Error creating wallet:", error);
    }
  };

  return <button onClick={handleCreateWallet}>Create Wallet</button>;
}
This wallet can then be accessed through the wallets array in the useTurnkey hook, which contains all embedded wallets associated with the sub-organization and all linked external wallets. This array is updated automatically when wallets are created, updated or removed.
import { useTurnkey } from "@turnkey/react-wallet-kit";

function WalletList() {
  const { wallets } = useTurnkey();
  return (
    <ul>
      {wallets.map((wallet) => (
        <li key={wallet.walletId}>
          {wallet.walletName} - {wallet.walletId}
        </li>
      ))}
    </ul>
  );
}
You can also manually refresh the wallets by calling the refreshWallets function from the useTurnkey hook.
import { useTurnkey } from "@turnkey/react-wallet-kit";

function RefreshWalletsButton() {
  const { refreshWallets } = useTurnkey();

  return <button onClick={refreshWallets}>Refresh Wallets</button>;
}

Creating wallet accounts

You can specify which accounts to create in the wallet by passing an array of account formats or account objects to the accounts parameter.

Using address formats

You can use predefined account formats to create accounts in the wallet. The wallet account will be automatically created with the correct path and path index based on the existing wallet the sub-organization has.
const ethereumOnlyWalletId = await createWallet({
  walletName: "Ethereum Only Wallet",
  accounts: ["ADDRESS_FORMAT_ETHEREUM"], // This will create one Ethereum account in the wallet
});

const solanaOnlyWalletId = await createWallet({
  walletName: "Solana Only Wallet",
  accounts: ["ADDRESS_FORMAT_SOLANA"], // This will create one Solana account in the wallet
});

const weirdWalletId = await createWallet({
  walletName: "Weird Wallet",
  accounts: [
    // This will create one Cosmos, one Sei, one Sui, two Ethereum, and three Solana accounts in the wallet
    "ADDRESS_FORMAT_COSMOS",

    "ADDRESS_FORMAT_SEI",

    "ADDRESS_FORMAT_SUI",

    "ADDRESS_FORMAT_ETHEREUM",
    "ADDRESS_FORMAT_ETHEREUM",

    "ADDRESS_FORMAT_SOLANA",
    "ADDRESS_FORMAT_SOLANA",
    "ADDRESS_FORMAT_SOLANA",
  ],
});

Using account objects

You can also create accounts by passing an array of account objects. This allows you to specify the curve, pathFormat, path, and addressFormat.
const customWalletId = await createWallet({
  walletName: "My Custom Ethereum Wallet",
  accounts: [
    {
      curve: "CURVE_SECP256K1",
      pathFormat: "PATH_FORMAT_BIP32",
      path: `m/44'/60'/0'/0/0`,
      addressFormat: "ADDRESS_FORMAT_ETHEREUM",
    },
  ],
});

After wallet creation

You can use the createWalletAccount function to add more accounts to an existing wallet.
import { useTurnkey } from "@turnkey/react-wallet-kit";

function AddAccountButton({ walletId }) {
  const { createWalletAccounts, wallets } = useTurnkey();

  const handleAddAccount = async () => {
    try {
      const address = await createWalletAccounts({
        walletId: wallets[0]?.walletId,
        accounts: ["ADDRESS_FORMAT_ETHEREUM"],
      });
      console.log("Account created:", address);
    } catch (error) {
      console.error("Error creating account:", error);
    }
  };

  return <button onClick={handleAddAccount}>Add Account</button>;
}

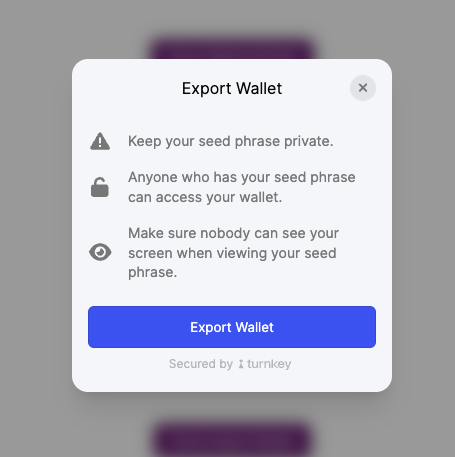
Importing and exporting wallets

You can also import and export wallets using the handleImportWallet and handleExportWallet functions. These functions open up UI modals that allows users to export or import wallets through a secure iframe. You can learn more about importing using an iframe and exporting using an iframe before continuing.
import { useTurnkey } from "@turnkey/react-wallet-kit";

function ImportExportWalletButtons() {
  const { handleImportWallet, handleExportWallet, wallets } = useTurnkey();

  return (
    <div>
      <button
        onClick={() => {
          await handleImportWallet();
        }}
      >
        Import Wallet
      </button>
      <button
        onClick={() => {
          await handleExportWallet({
            walletId: wallets[0].walletId,
          });
        }}
      >
        Export Wallet
      </button>
    </div>
  );
}
You will see this import modal when you click the “Import Wallet” button: Import Wallet Modal and this export modal when you click the “Export Wallet” button: Export Wallet Modal

Next steps

Now that you know how to create and manage embedded wallets in your React application, check out the Connecting External Wallets guide to learn how to connect and use external wallets. Don’t want to use external wallets? Check out the Signing guide to learn how to sign transactions and messages with the embedded wallets you’ve created.