Overview

The Embedded Wallet Kit makes authentication incredibly simple. With just one function call, you can trigger a login or signup modal that automatically reflects the authentication methods you’ve configured in your Turnkey Dashboard. You can also call specific login and signup functions to create your own UI components and authentication flow.

Quick authentication

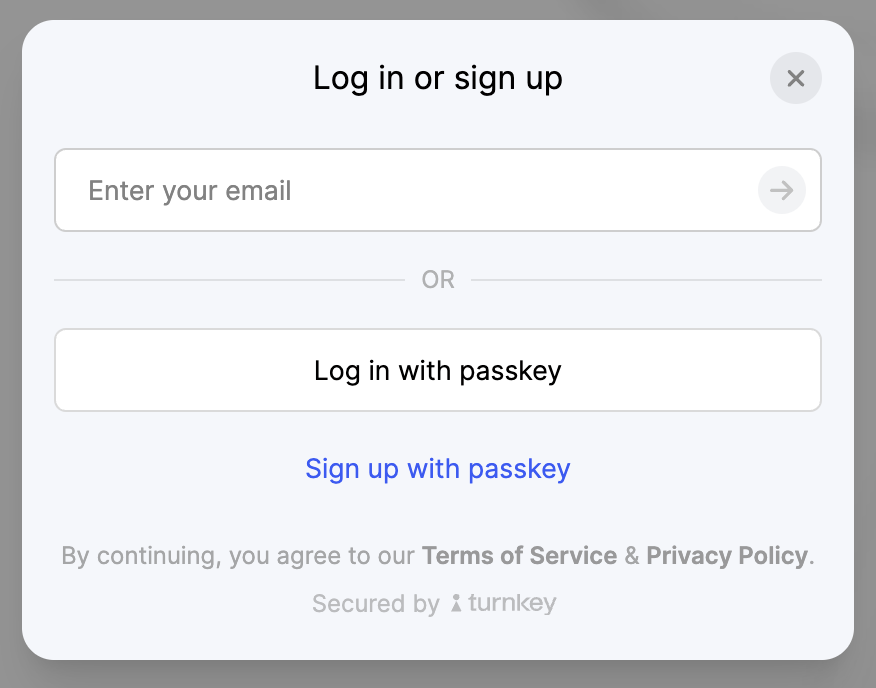
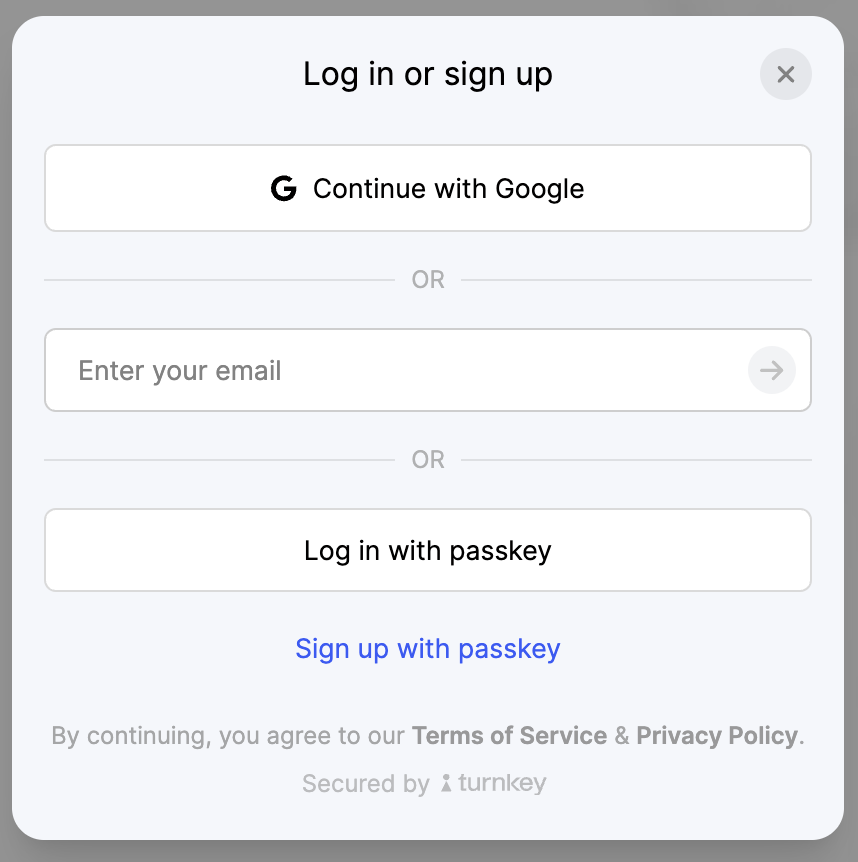
The easiest way to handle authentication is using the handleLogin function from the useTurnkey hook. This will automatically show a modal with all the authentication methods you’ve enabled in your dashboard.
page.tsx
"use client";
import { useTurnkey } from "@turnkey/react-wallet-kit";

function LoginButton() {
  const { handleLogin } = useTurnkey();
  return <button onClick={handleLogin}>Login / Sign Up</button>;
}
export default function Home() {
  return (
    <LoginButton /> 
  );
}
If you’re following our quick start guide, we can now view our button.
npm run dev
When a user clicks this button, they’ll see a modal with the authentication options you configured during the organization setup. Login modal showing authentication options

UI customization

Want to customize the look and feel of the authentication modal? You can learn more about customizing the UI components in the UI Customization section.

Without a modal

If you need more control over the authentication flow, you can also call specific login and signup functions individually, without showing a modal.
import { useTurnkey } from "@turnkey/react-wallet-kit";

function CustomAuthButtons() {
  const { loginWithPasskey, signUpWithPasskey } = useTurnkey();

  return (
    <div>
      <button onClick={loginWithPasskey}>Log in with Passkey</button>
      <button onClick={signUpWithPasskey}>Sign Up with Passkey</button>
    </div>
  );
}
For a complete list of available authentication functions, check out the SDK Reference.

Knowing when users are authenticated

To check if a user is authenticated, you can use the authState variable from the useTurnkey hook.
import { useTurnkey, AuthState } from "@turnkey/react-wallet-kit";

function AuthStatus() {
  const { authState, user, handleLogin } = useTurnkey();

  return (
    <div>
      {authState === AuthState.Authenticated ? (
        <p>Welcome back, {user?.userName}!</p>
      ) : (
        <button onClick={handleLogin}>Log in</button>
      )}
    </div>
  );
}
You can also set up an onAuthenticationSuccess callback passed in through the TurnkeyProvider to handle post-authentication logic, such as redirecting.
<TurnkeyProvider
  config={turnkeyConfig}
  callbacks={{
    onAuthenticationSuccess: ({ session }) => {
      console.log("User authenticated:", session);
      router.push("/dashboard");
    },
  }}
>
  {children}
</TurnkeyProvider>

Configuring OAuth

Using OAuth requires additional configuration. To start, ensure you enable OAuth and check the OAuth providers you want to use in the Wallet Kit section of the Turnkey Dashboard. See the Getting Started guide for more details. OAuth providers configuration You can choose to enter your client IDs for each OAuth provider and the redirect url in the dashboard OAuth client IDs configuration Or, you can provide the client IDs and redirect URI through environment variables and pass them in the 
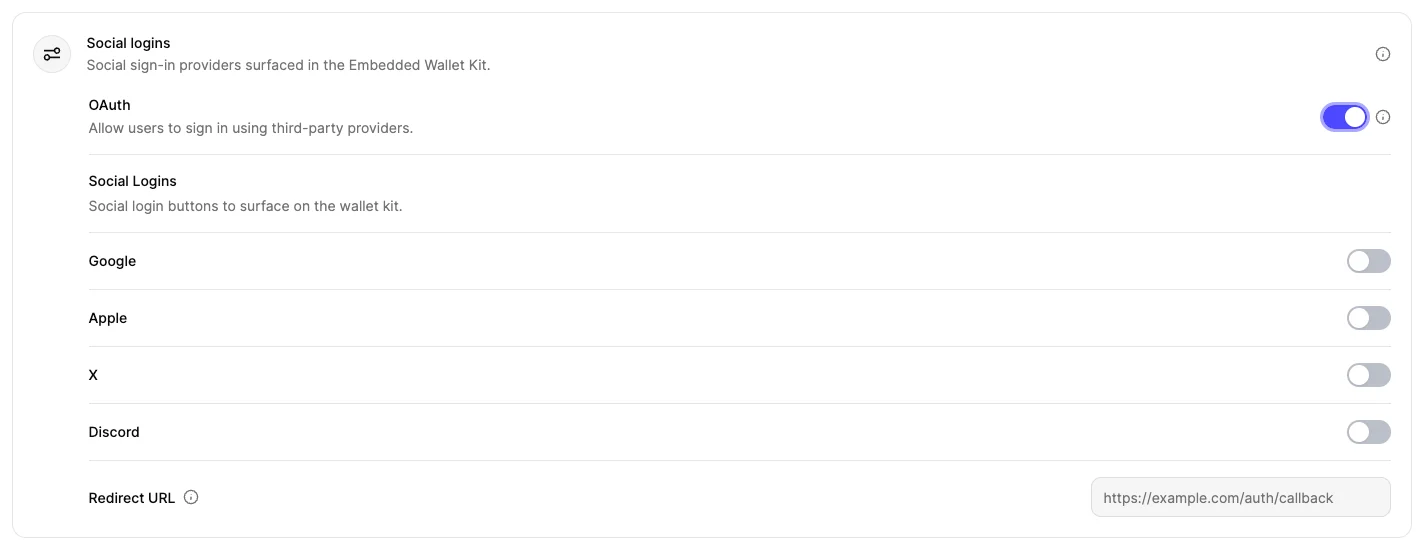
TurnkeyProvider’s config. This is useful if you want to use different OAuth client IDs or a different redirect URL for different environments (e.g., development, staging, production). Here, you can also toggle openOauthInPage to true if you want OAuth to replace the current page instead of opening a new popup.
<TurnkeyProvider
  config={{
    authProxyConfigId: process.env.NEXT_PUBLIC_AUTH_PROXY_CONFIG_ID || "",
    organizationId: process.env.NEXT_PUBLIC_ORGANIZATION_ID || "",

    auth: {
      oauthConfig: {
        openOauthInPage: true, // Set to true if you want OAuth to replace the current page instead of opening a new popup

        // You can also provide these values through the Turnkey dashboard:
        oauthRedirectUri: process.env.NEXT_PUBLIC_REDIRECT_URI || "", // Eg: "https://your-app.com/home". This must match the redirect URI configured in your OAuth provider's dashboard.

        // You will typically get these from the OAuth provider's dashboard. Eg: Google developer console.
        googleClientId: process.env.NEXT_PUBLIC_GOOGLE_CLIENT_ID || "",
        appleClientId: process.env.NEXT_PUBLIC_APPLE_CLIENT_ID || "",
        facebookClientId: process.env.NEXT_PUBLIC_FACEBOOK_CLIENT_ID || "",
        xClientId: process.env.NEXT_PUBLIC_X_CLIENT_ID || "",
        discordClientId: process.env.NEXT_PUBLIC_DISCORD_CLIENT_ID || "",
      },
    },
  }}
>
  {children}
</TurnkeyProvider>
You can retrieve the client IDs from the OAuth provider’s dashboard. Note that the redirect URI must match the one you configured in your TurnkeyProvider config. 
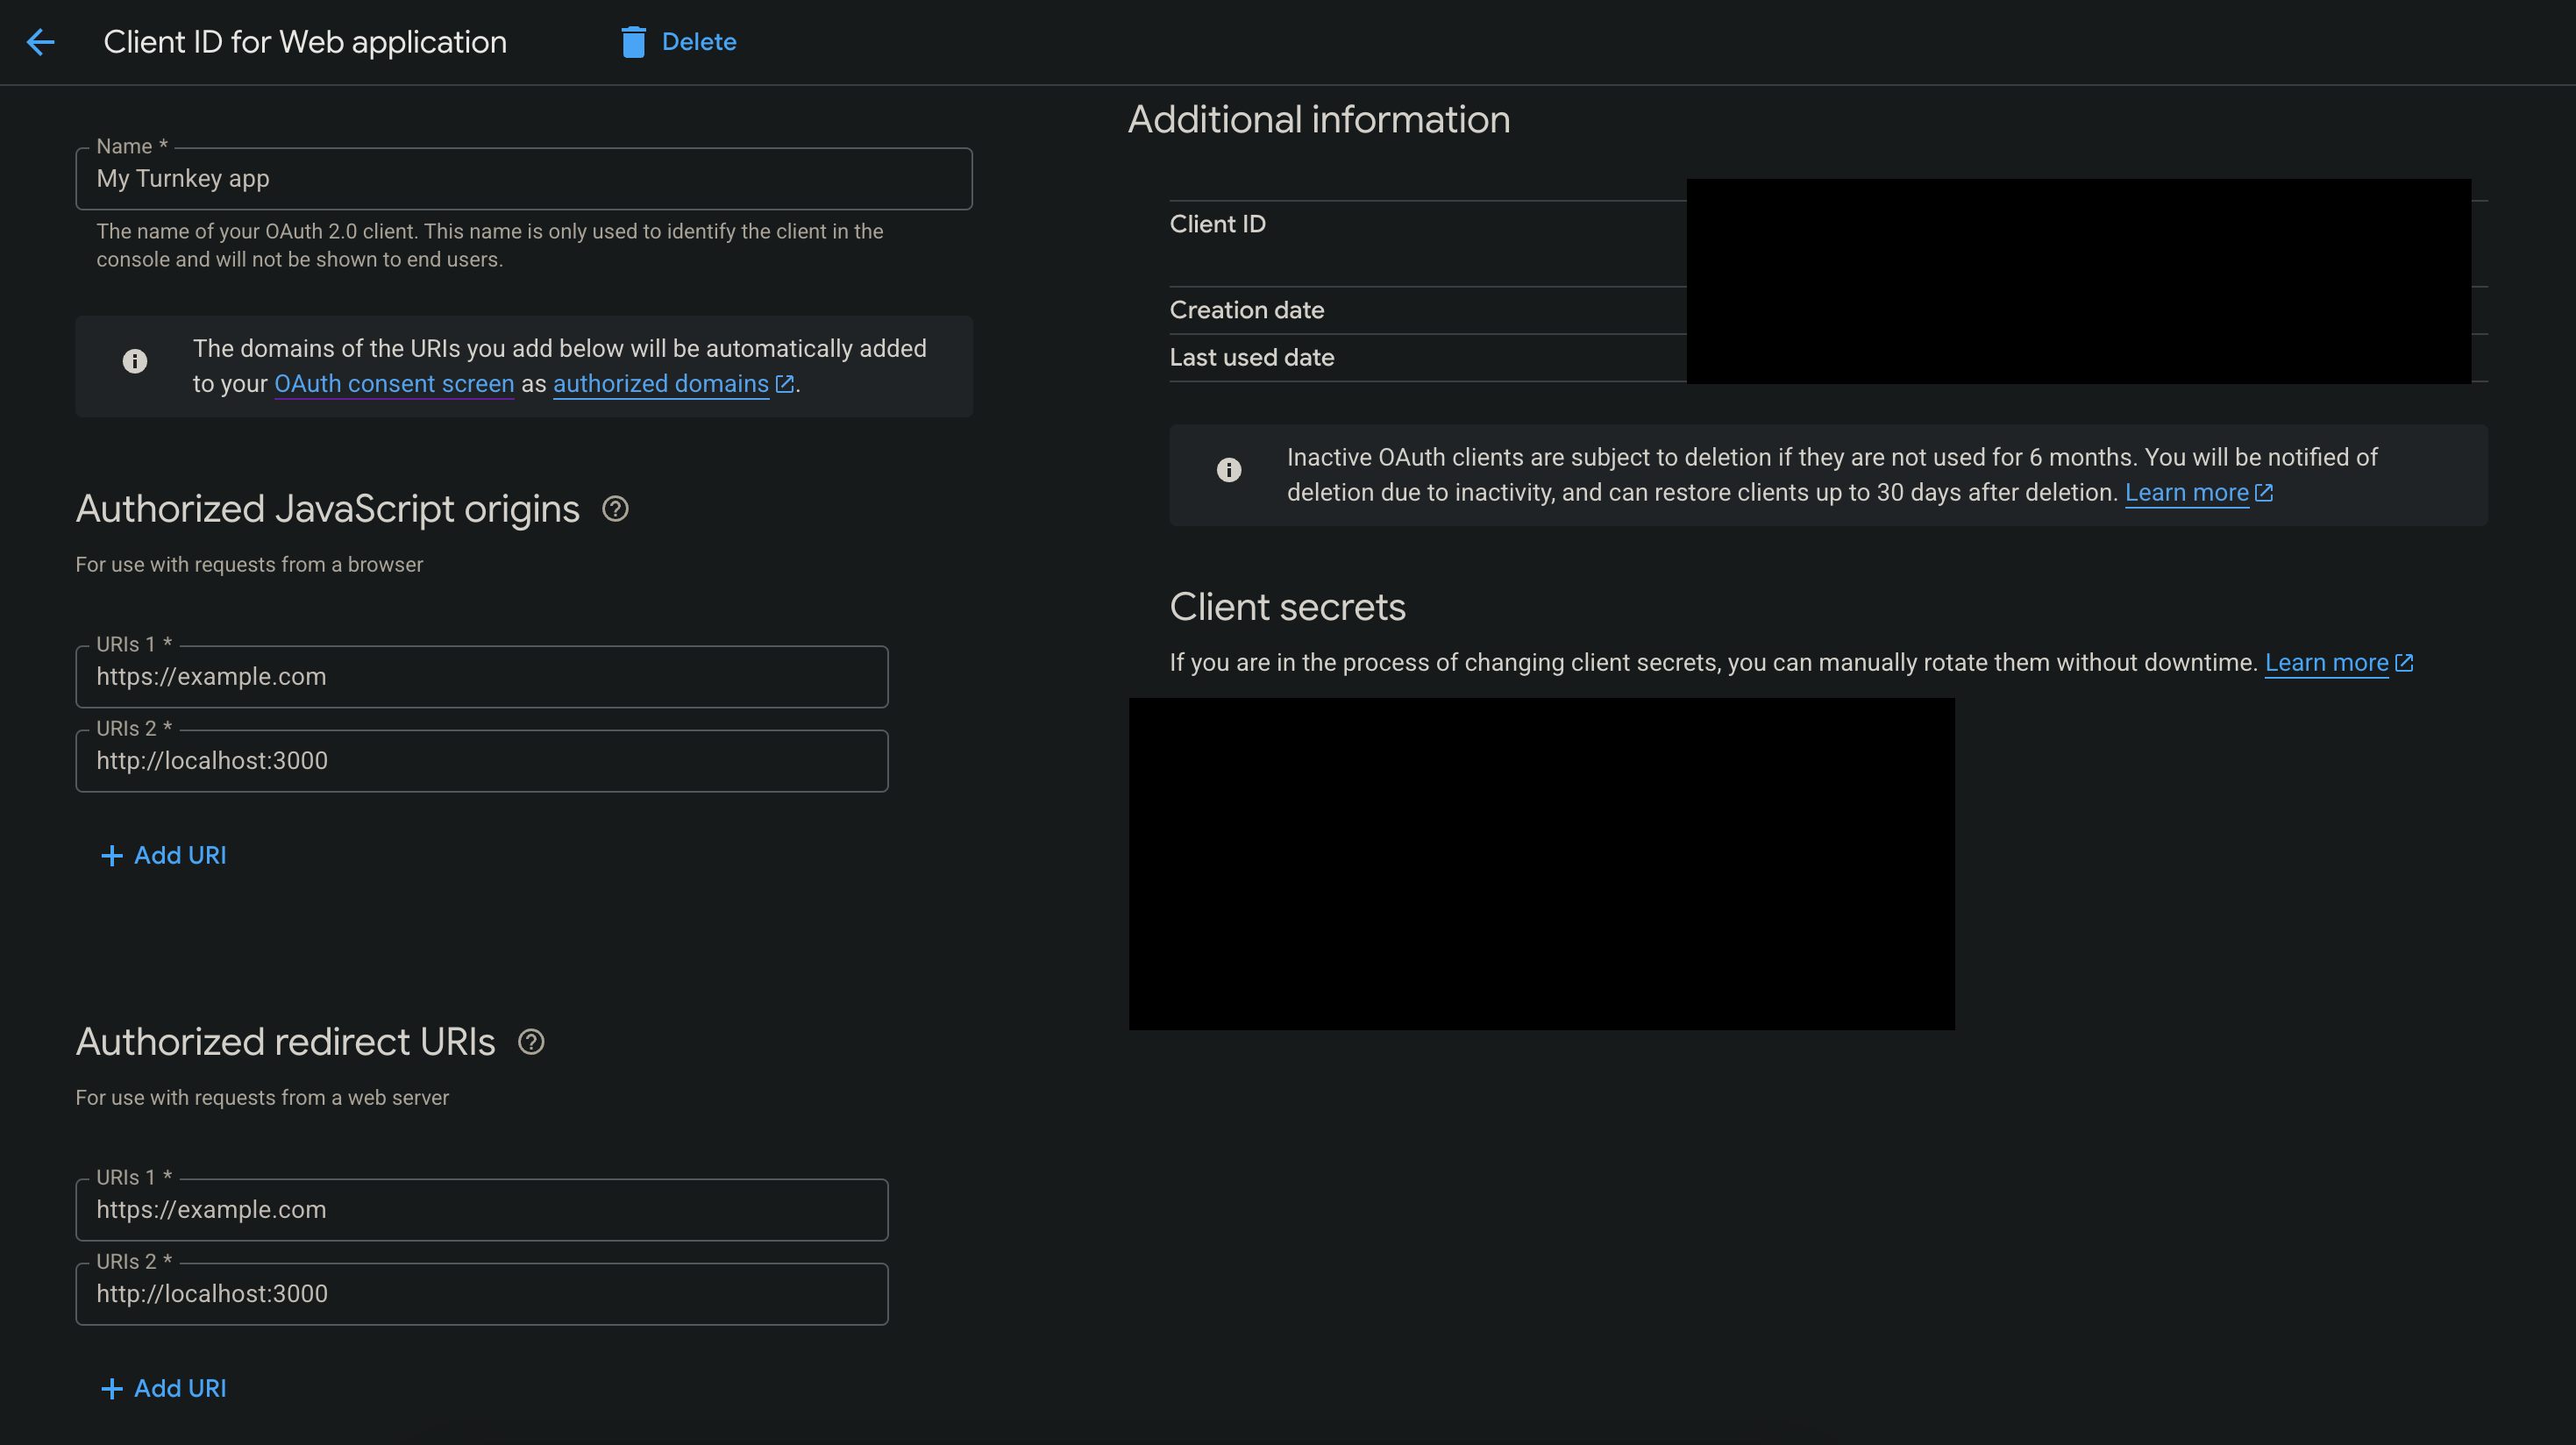
For example, for Google, you can create a web client ID in the Google developer console. The Google developer console Your “Log in or sign up” modal should now include the OAuth options you configured. Authentication modal with OAuth options

OAuth2.0 providers (X, Discord, etc)

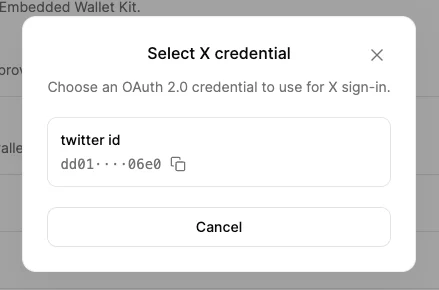
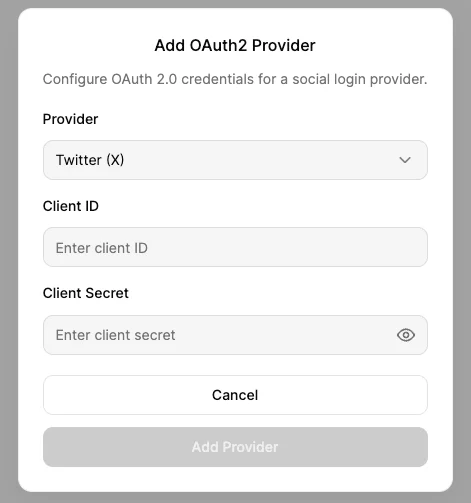
For OAuth providers that exclusively use OAuth2.0 (e.g., X, Discord), you will need to configure a few additional settings in your Turnkey Dashboard. In the Wallet Kit section of the dashboard, head to the Socials tab and click Add provider. OAuth2.0 providers configuration Select the provider you want to add from the dropdown, and fill in the required fields. You can find these values in the provider’s developer console. Any secrets will automatically be encrypted before uploading to Turnkey. Adding an OAuth2.0 provider Once you’ve added the provider, head back to the Authentication tab, and enable the provider you just added under the SDK Configuration section. Enabling an OAuth2.0 provider Click Select to choose your newly added client ID, then click Save Settings. You can also simply enter the client ID in the 
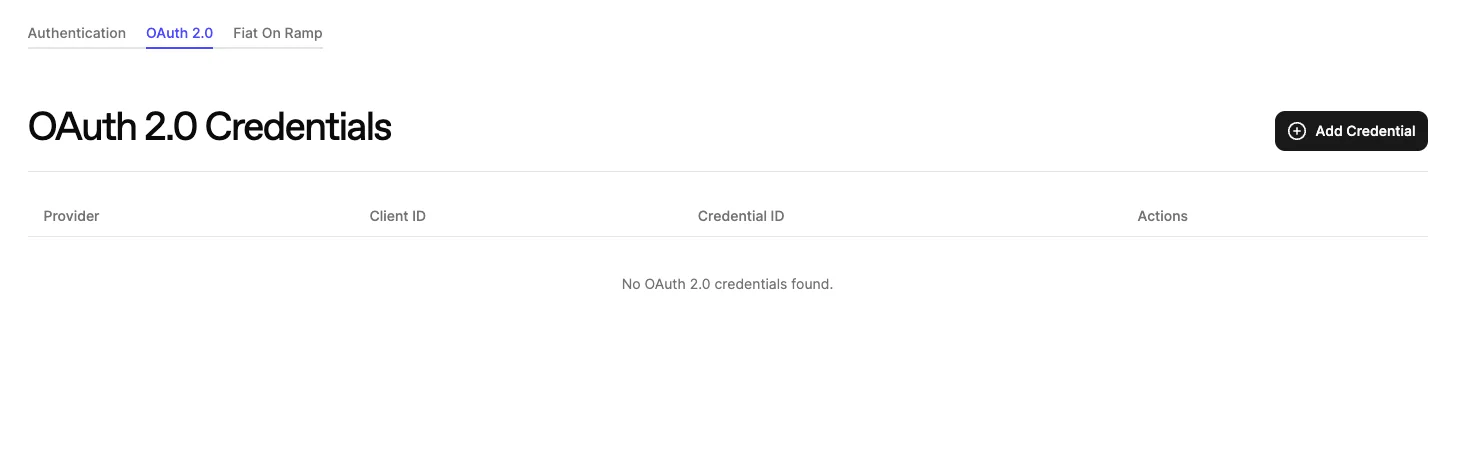
TurnkeyProvider’s config as shown above. Selecting an OAuth2.0 provider

Customize sub-organization creation

Need to configure default user names, passkey names, wallet creations or anything sub-org related? You can learn more about customizing the sub-orgs you create in the Sub-Organization Customization section.

Next steps

Once your users are authenticated, you can start building embedded wallet functionality! Check out the Using Embedded Wallets guide to learn how to create and manage wallets in your React app.