Documentation Index
Fetch the complete documentation index at: https://docs.turnkey.com/llms.txt
Use this file to discover all available pages before exploring further.
Overview
This guide provides solutions to common issues you might encounter while using@turnkey/react-wallet-kit. If you run into any problems, check this section first for potential fixes.
Handling errors with onError
Before we begin, let’s attach an onError callback function to the TurnkeyProvider. Any errors that occur during the execution of functions or initialization will be passed into this callback. This will help you debug issues more effectively.
Common issues
There are a few common issues that developers or end-users may encounter when using@turnkey/react-wallet-kit. Here are some of them along with potential solutions:
1. Turnkey SDK failed to initialize

Problem
This error shows up when the SDK fails to initialize properly. The initialization process includes a series of network requests that must be made to Turnkey so your configuration must be correct before you launch your app. This issue can happen for several reasons, such as:- Missing or incorrect
authProxyConfigIdororganizationIdin theTurnkeyProviderconfig. - Network issues preventing the SDK from reaching Turnkey’s servers.
- Incorrectly configured
apiBaseUrlorauthProxyUrl. - Auth proxy not being enabled in the Turnkey Dashboard.
onError callback in the TurnkeyProvider as shown above.
Solution
Make sure you have the correctauthProxyConfigId and organizationId in your TurnkeyProvider config. You can find these values in the Turnkey Dashboard.
.env file or environment configuration. You can also log these values to the console to verify they are being set correctly.
authProxyConfigId from the TurnkeyProvider config. This will disable the Turnkey auth proxy and allow you to use your own authentication flow. Note that the Log in or sign up modal will not be available in this case, and you will need to implement your own authentication flow.
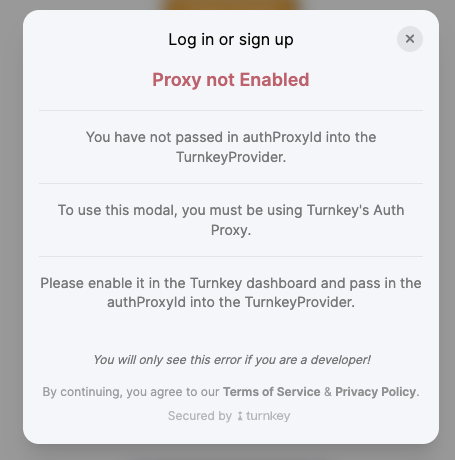
2. Proxy not enabled
Problem
This error indicates that you are trying to use the Log in or sign up modal without using Turnkey’s auth proxy. TheauthProxyConfigId is required to use the Turnkey authentication flow.
Solution
To resolve this issue, you need to enable the Auth Proxy in the Turnkey Dashboard under the Wallet Kit section. Once enabled, you will receive anauthProxyConfigId that you can use in your TurnkeyProvider config. Pass this authProxyConfigId to the TurnkeyProvider config to enable the authentication flow.
authProxyConfigId from the TurnkeyProvider config. This will disable the Turnkey Auth Proxy and allow you to use your own authentication flow. Note that the Log in or sign up modal will not be available in this case, and you will need to implement your own authentication flow.
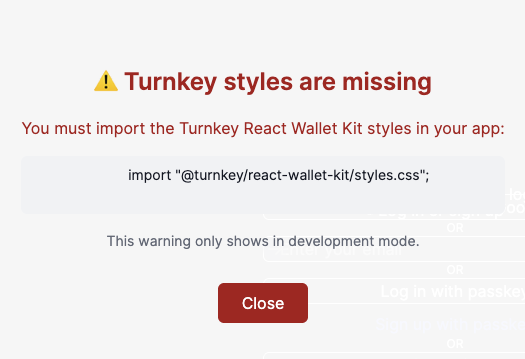
3. Turnkey styles are missing
Problem
This error indicates that the Turnkey styles are not being applied to the UI components. This can happen if you forget to import the styles in your main application file or if the styles are being modified by other CSS rules in your application.Solution
Make sure to import the Turnkey styles in your main application file (e.g.,app/layout.tsx in Next.js). You can do this by adding the following line at the top of your file:
supressMissingStylesError: true to the ui object in the TurnkeyProvider config. This will disable the styles check.
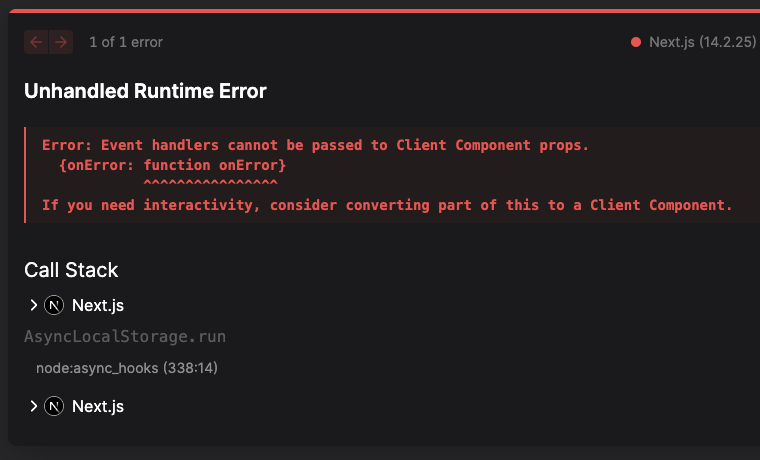
4. Event handlers cannot be passed to Client Component props
Problem
This error occurs when you try to pass in a callback into theTurnkeyProvider but you’re using the TurnkeyProvider in a server component. In Next.js, components default to server components, which means they cannot have event handlers or state.
Solution
To resolve this issue, you need to ensure that theTurnkeyProvider is used in a client component. You can do this by adding "use client"; at the top of your file. This will make the component a client component and allow you to pass in event handlers.
5. No active session or token available

Problem
This error occurs when you try to use functions that require an authenticated user, such ashandleSignMessage, without having an active session. This can happen if the user is not logged in or if the session has expired.
Solution
To resolve this issue, ensure that the user is authenticated before calling functions that require an active session. You can check theauthState variable from the useTurnkey hook to determine if the user is authenticated.
autoRefreshSession option in the TurnkeyProvider config. This will ensure that the session is refreshed before it expires, keeping the user authenticated.
onSessionExpired callback in the TurnkeyProvider. This will allow you to handle session expiration gracefully, such as prompting the user to log in again.
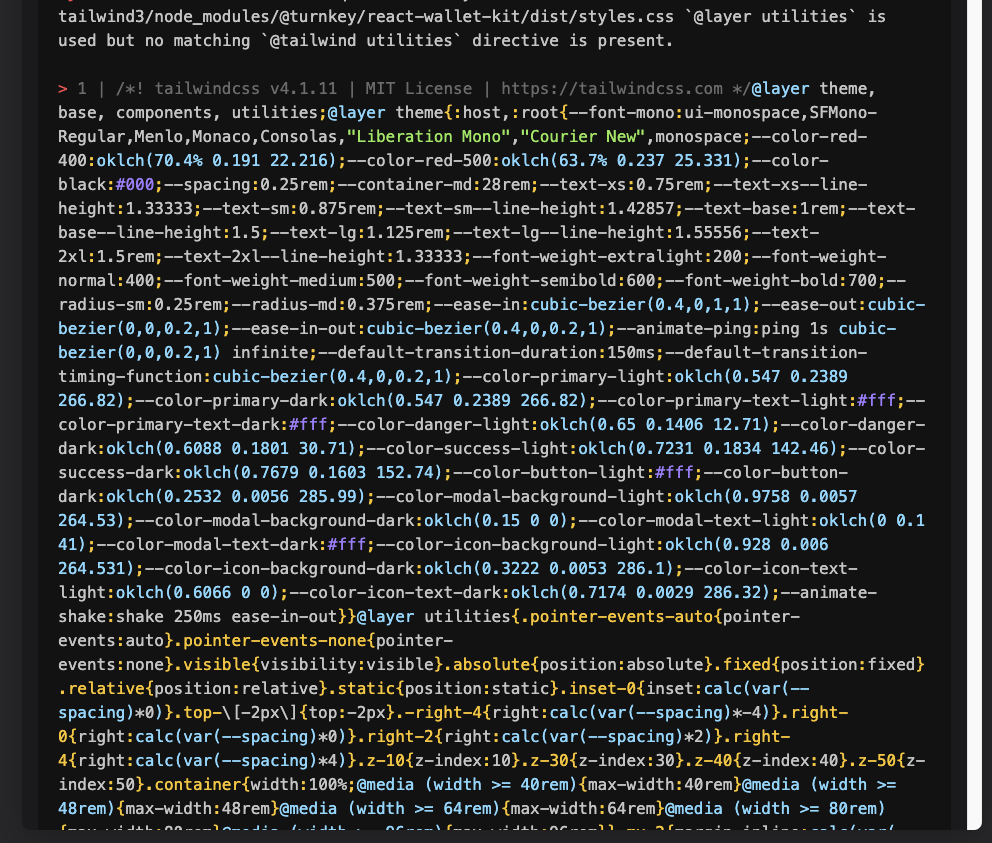
6. @layer utilities is used but no matching @tailwind utilities directive is present (Tailwind V3 error)
Problem
This error occurs after importing the Turnkey styles in a Tailwind CSS project using Tailwind CSS v3.@turnkey/react-wallet-kit is built with Tailwind CSS v4 under the hood, and exports the styles into a regular CSS file for importing into any project. However, if you are using Tailwind CSS v3, you may encounter this error because Tailwind CSS v3 uses different syntax for CSS directives. Note that this error does not occur in Tailwind CSS v4 projects or when Tailwind CSS is not installed at all.
Solution
We recommend upgrading to Tailwind CSS v4 since this is currently the latest version. You can use the official Tailwind CSS upgrade guide to help you with the upgrade process. If you cannot upgrade to Tailwind CSS v4, you can follow these steps to resolve the issue:Add postcss-import to your PostCSS config
Add postcss-import to your
postcss.config.mjs (or equivalent) file:Import Turnkey styles in your main CSS file
Import the Turnkey styles in your main CSS file (e.g., The Turnkey styles must be imported before the Tailwind directives to ensure that the styles are applied correctly. You also must point to the
styles/globals.css):We usually recommend importing the styles in your main application file (e.g., app/layout.tsx in Next.js) however, if you’re using Tailwind CSS v3, you can’t do this. Please remove the import if you already have it in your main application file.For Tailwind CSS v3, you need to import the Turnkey styles in your main CSS file (e.g., styles/globals.css) by pointing the import to @turnkey/react-wallet-kit/dist/styles.css file:dist directory to properly retrieve the styles (@turnkey/react-wallet-kit/dist/styles.css instead of @turnkey/react-wallet-kit/styles.css).7. Radix UI overlapping portals
Problem
This issue occurs when using certain Radix UI components (e.g., Dialog, DropdownMenu, etc.) in the same application as@turnkey/react-wallet-kit. Radix UI uses portals to render components outside of the main DOM hierarchy, which can cause conflicts when trying to open a Turnkey modal while a Radix UI component is also open. You may notice that the Turnkey modal becomes unresponsive or that the Radix UI component remains open and blocks interaction with the Turnkey modal.
Solution
We recommend avoiding using portal-based components from Radix UI (or similar libraries that use portals) while Turnkey’s modals are open. You can also try switching toheadless-ui components since Turnkey’s modals are built with headless-ui under the hood.
If you cannot avoid using Radix UI components, you can try the following workaround:
Update your global CSS file
Add the following CSS to your global CSS file (e.g., This will apply
styles/globals.css):pointer-events: auto; to the Turnkey modal portal, allowing it to receive pointer events even when other portals are open.Modify your Radix UI components
You need to prevent outside click events from closing the Radix UI components when the Turnkey modal is open.You can do this by adding the following Overall, your Radix UI dialog component (or similar) should look something like this:
onPointerDownOutside handler to your Radix UI components:8. Module not found. The extension in the request is mandatory for it to be fully specified (Create React App)

Problem
This error occurs when using Create React App (CRA) and trying to import@turnkey/react-wallet-kit. CRA requires that all imports include the file extension to be fully specified. Note that this can also occur in strict ESM build environments (e.g., Next.js builds in CI) where fully specified imports are required. In those cases you may see errors like: Cannot find module '@turnkey/core/dist/__types__/enums' and a suggestion to import @turnkey/core/dist/__types__/enums.js. The fix is to ensure the import is resolved with the .js extension (e.g., @turnkey/core/dist/__types__/enums.js). If you can’t edit the package source directly, apply a small build-time patch that rewrites the import.
Solution
Follow these steps to resolve the issue:Eject from Create React App (CRA)
Ejecting from CRA will give you full control over the Webpack configuration, allowing you to modify it to remove the need for fully specified imports.Note that this action is irreversible, so make sure to commit your changes before ejecting.
9. Client is not initialized error when using Turnkey functions
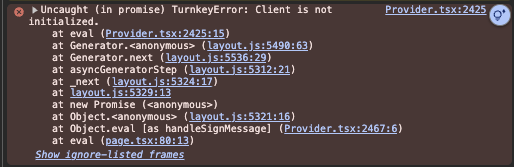
Problem
This error occurs when you try to use Turnkey client functions before the SDK has finished initializing said client. The Turnkey SDK performs several asynchronous operations during initialization, and if you attempt to call client functions before this process is complete, you’ll encounter this error.Solution
To resolve this issue, ensure that you only call Turnkey client functions after the SDK has fully initialized. You can do this by checking theclientState state variable from the useTurnkey hook. The clientState variable indicates the current state of the Turnkey client. You can read up more about how to use the clientState variable and why its important in the Getting Started guide.
Example solutions to potential issues:
Calling client functions in useEffects or event handlers without checking client readiness:
clientState before calling client functions: