Create your Turnkey organization
- Visit app.turnkey.com/dashboard/v2/auth/initial and enter your email address
- Confirm your email by clicking on the link inside of the confirmation email
- Follow the prompts to add your first authenticator and create your organization
Find your organization ID
All API requests require an organization ID. Yours can be located in the user dropdown menu at the top right corner of the dashboard.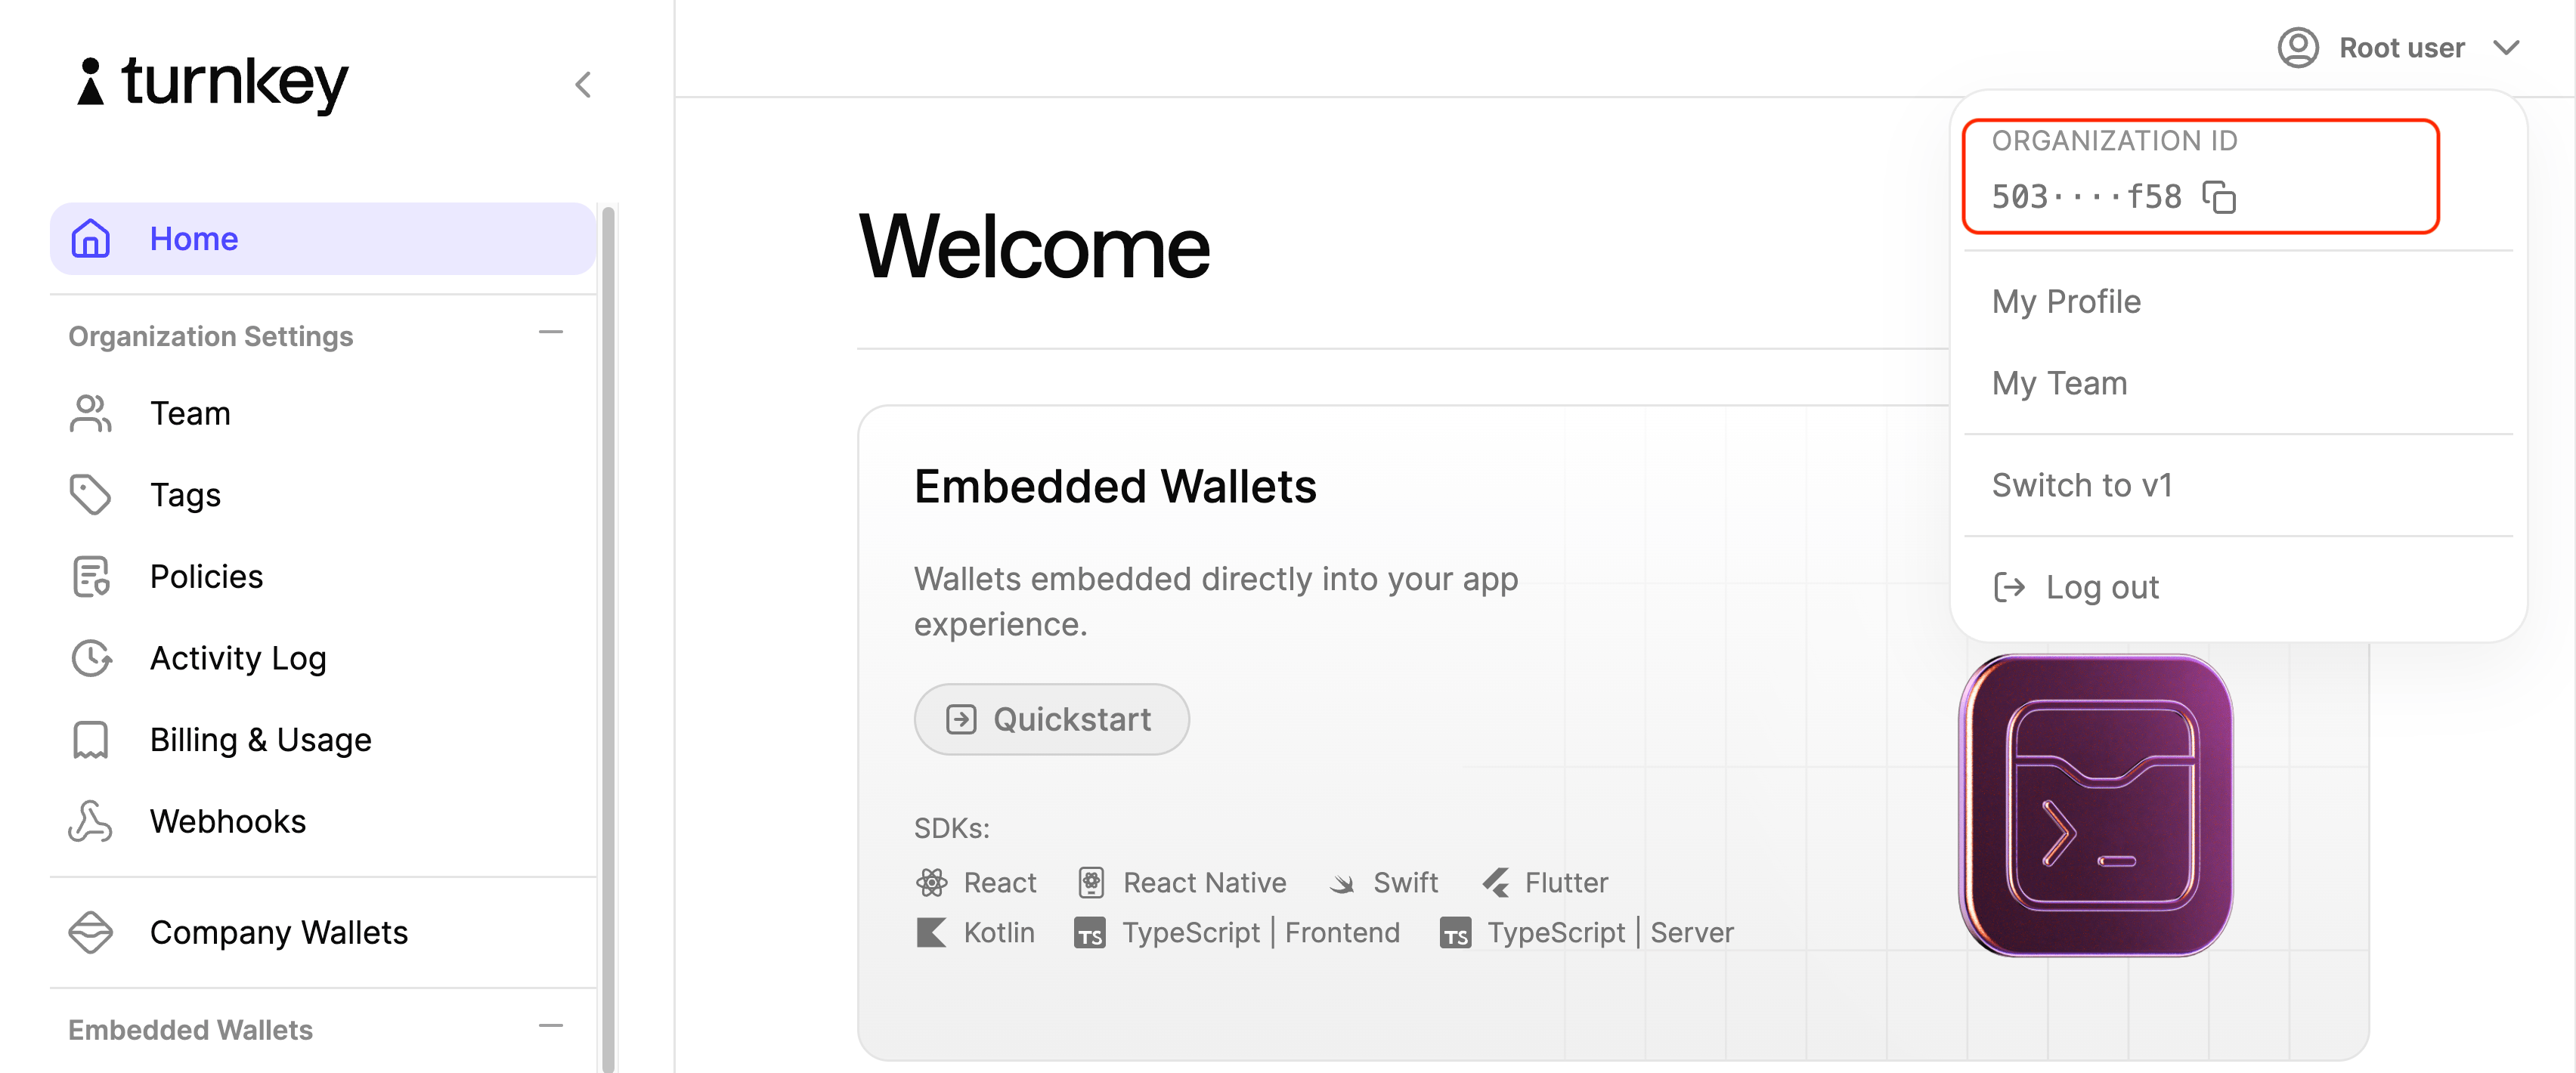
Add an API key
Turnkey API Keys are generic public / private key pairs that allow you to make requests to our API. To generate a new key pair, we’ll use the Turnkey CLI.Installing turnkey
Generate an API key
publicKey field in the output. In the next step, we’ll add this to our User.
Add your public API key
Navigate to your user page by clicking on “My Profile” in the user dropdown menu.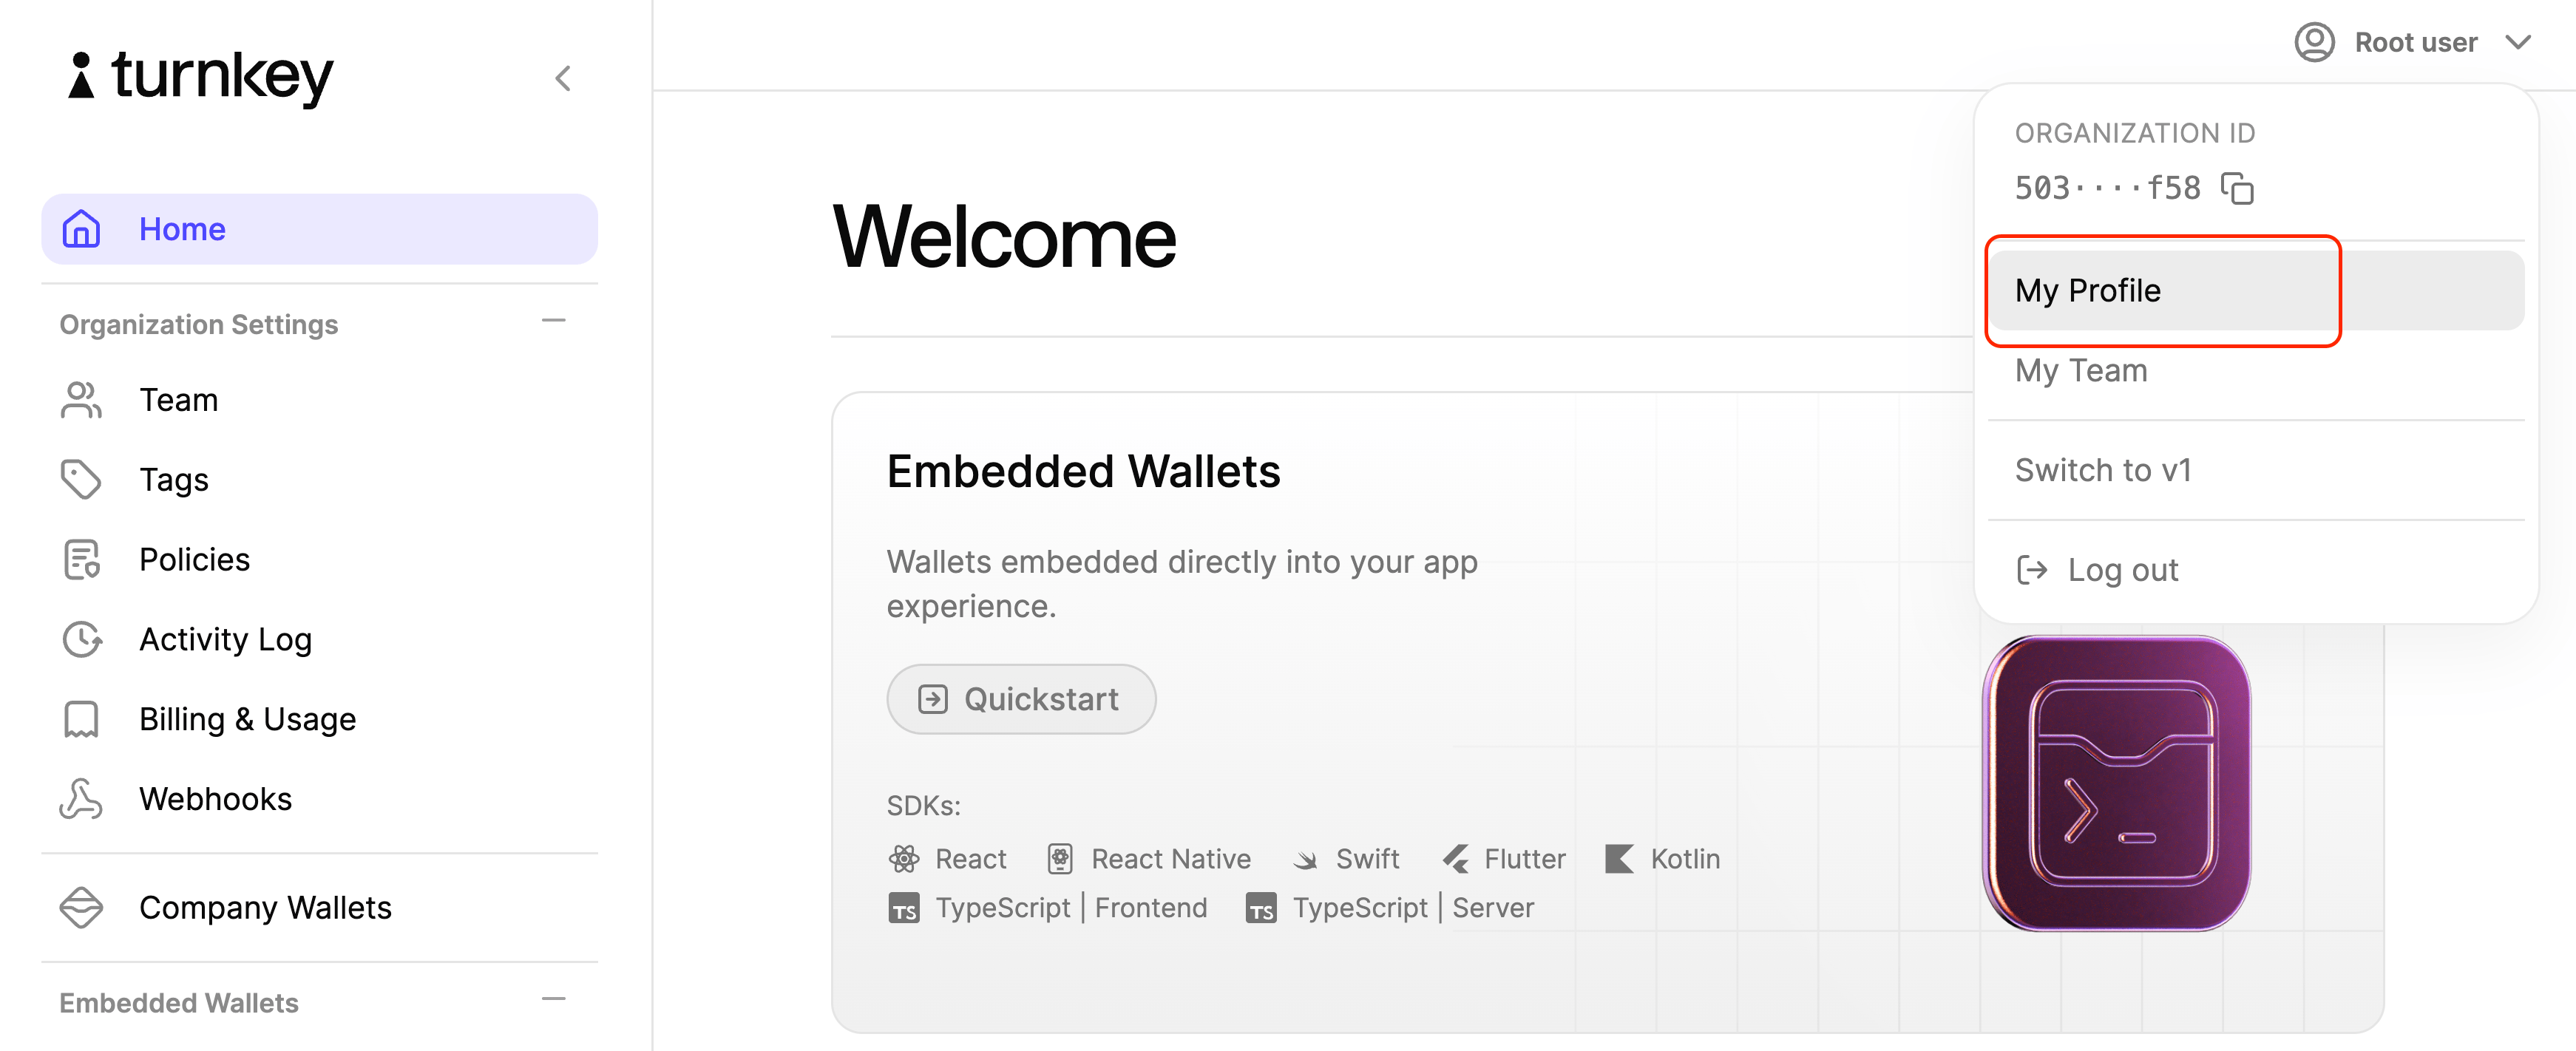
- if you would like to manually copy your locally stored public/private API key files (e.g.
key.public,key.private), you will have to save the files without newlines (which occupy extra bytes). For example, for VIM, use:set binary noeolor:set binary noendoflinebefore writing.
Create a wallet
Wallets are collections of cryptographic key pairs typically used for sending and receiving digital assets. To create one, we need to provide a name:Create an Ethereum account
To create a cryptographic key pair on our new Wallet, we need to pass our desired address format:0x08cb1216C95149DF66978b574E484869512CE2bF)
that we’ll need to sign a transaction. You can see your new Wallet account with:
Sign a transaction
Now you can sign an Ethereum transaction with this new address with oursign_transaction endpoint. Make sure to replace the
unsignedTransaction below with your own. You can use our
simple transaction generator if you need a quick transaction for testing:
Next steps
- Check out our examples to see what can be built
- Learn more about Organizations and Wallets
- See our API design or dive into our API reference