
Turnkey organization setup

To start, you must create a Turnkey organization via the Turnkey dashboard. The steps to do so are described in the Account Setup section. For this setup, we will be using Turnkey’s Auth Proxy to handle authentication. We can enable and configure this through the Turnkey dashboard.
1

Enable Auth Proxy

Navigate to the Wallet Kit section in the Turnkey Dashboard and enable the Auth Proxy.Auth Proxy toggle
2

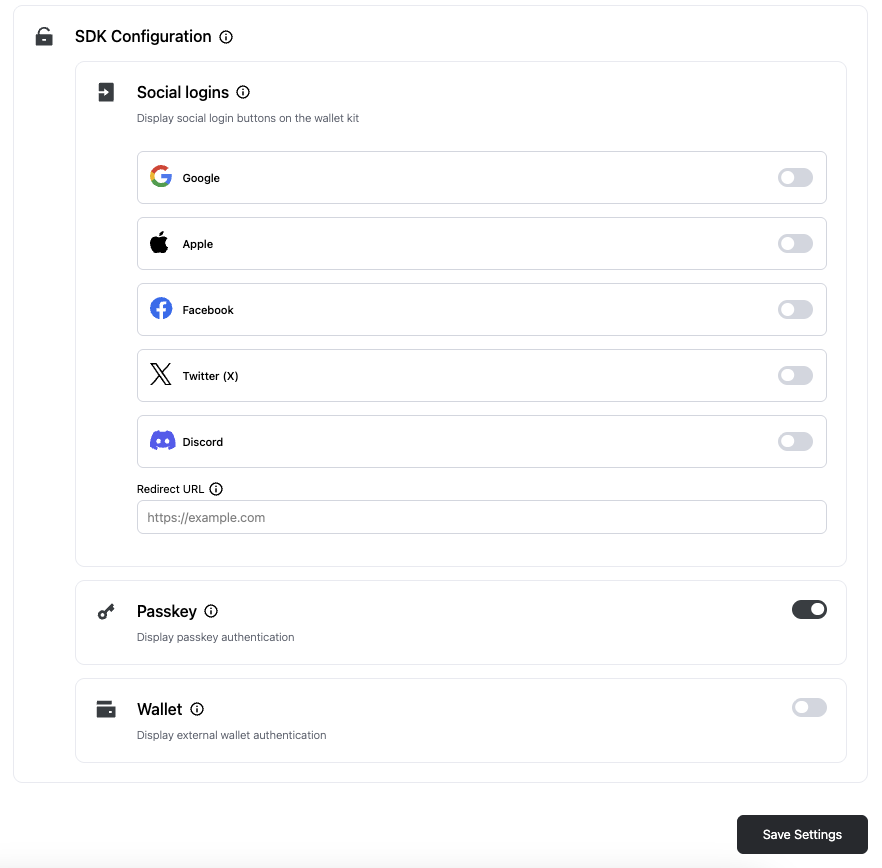
Customize auth methods

You can choose which auth methods to enable and customize various options from this screen. For this quickstart, let’s enable email OTP and passkeys. When you’re done, click Save.
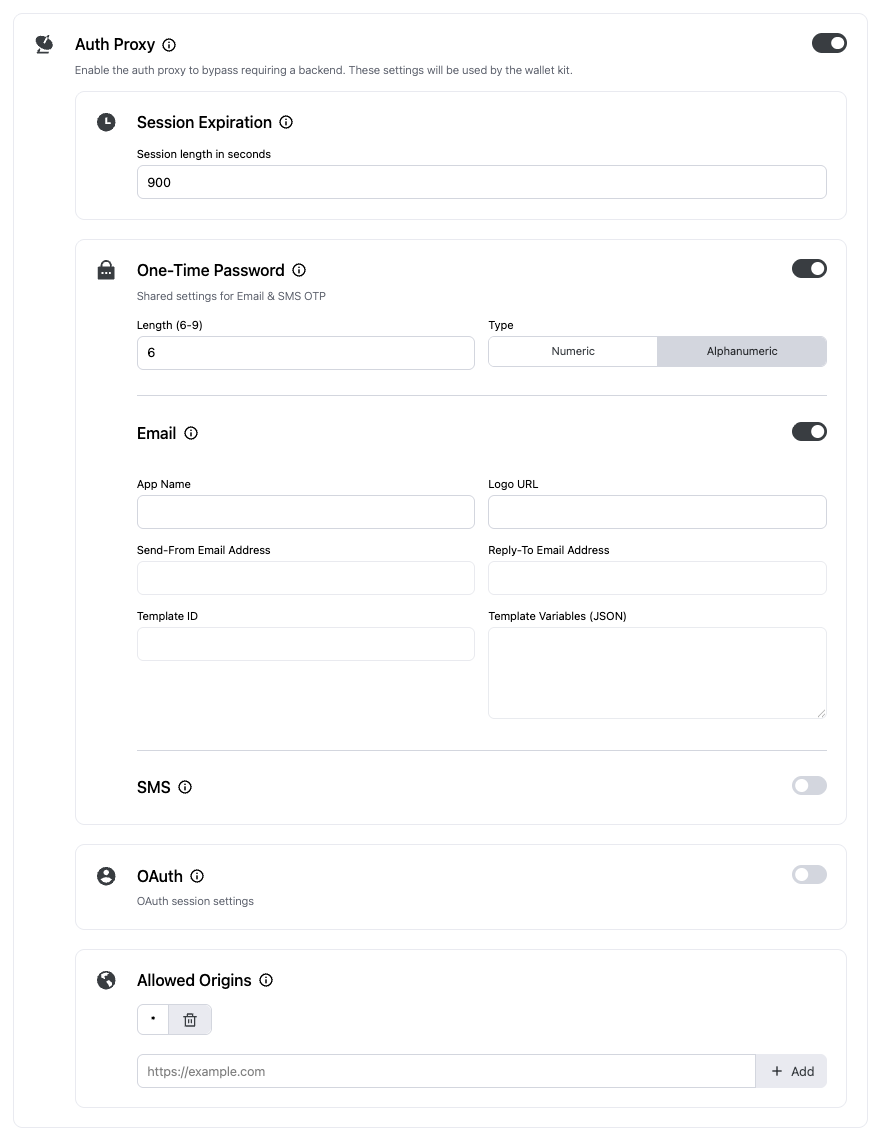
Auth Proxy optionsWallet kit options
3

Finish up

Once you’re finished with the auth proxy setup, you can copy the auth proxy config IDAuth Proxy Config idand your organization ID from the dashboard.Organization idThese will be used in the next steps to configure your app.

Installation

You can add the Turnkey Swift SDK to any Swift app using Swift Package Manager (SPM). iOS 17+ and Xcode 15+ are required.

Xcode UI

  • In Xcode, go to: File → Add Package Dependencies…
  • Enter the URL: https://github.com/tkhq/swift-sdk
  • Select the TurnkeySwift product and add it to your app target

Package.swift

If you manage dependencies in a Package.swift, add:
Package.swift
dependencies: [
  .package(url: "https://github.com/tkhq/swift-sdk", branch: "main")
],
targets: [
  .target(
    name: "MyApp",
    dependencies: [
      .product(name: "TurnkeySwift", package: "swift-sdk")
    ]
  )
]

Configure URL scheme and passkeys

  • If you are using OAuth, add your app scheme (e.g., myapp) so it can be used for OAuth redirects
  • If you plan to use passkeys, add an Associated Domain capability (Signing & Capabilities → Associated Domains) with webcredentials:yourdomain.com. For detailed passkey setup (entitlements, RP ID, UX), see the Passkeys guide.

SDK configuration

Set up a minimal configuration and provide the shared context to your app. The example below shows a SwiftUI setup:
Constants.swift
enum Constants {
  enum App {
    static let scheme = "myapp"           // URL scheme used for OAuth redirects
    static let rpId = "yourdomain.com"    // domain used for passkeys (if enabled)
  }
  enum Turnkey {
    static let organizationId = "<your_organization_id>"
    static let authProxyConfigId = "<your_auth_proxy_config_id>"
  }
}
App.swift
import SwiftUI
import TurnkeySwift

@main
struct MyApp: App {
  @StateObject private var turnkey: TurnkeyContext

  init() {
    let config = TurnkeyConfig(
      authProxyConfigId: Constants.Turnkey.authProxyConfigId,
      rpId: Constants.App.rpId,
      organizationId: Constants.Turnkey.organizationId,
      auth: .init(
        oauth: .init(appScheme: Constants.App.scheme)
      ),
      autoRefreshManagedState: true
    )
    TurnkeyContext.configure(config)
    _turnkey = StateObject(wrappedValue: TurnkeyContext.shared)
  }

  var body: some Scene {
    WindowGroup {
      ContentView()
        .environmentObject(turnkey)
    }
  }
}
In SwiftUI, you can access the context via @EnvironmentObject var turnkey: TurnkeyContext to read authentication state and, later, perform wallet operations:
ContentView.swift
import SwiftUI
import TurnkeySwift

struct ContentView: View {
    @EnvironmentObject var turnkey: TurnkeyContext

    var body: some View {
        Group {
            switch turnkey.authState {
            case .authenticated:
                Text("Welcome!")
            case .loading:
                ProgressView()
            default:
                Text("Please log in")
            }
        }
    }
}
For UIKit or AppKit, access TurnkeyContext.shared directly:
ViewController.swift
import UIKit
import TurnkeySwift

class ViewController: UIViewController {
    override func viewDidLoad() {
        super.viewDidLoad()

        // Access the shared context
        let turnkey = TurnkeyContext.shared

        // Check authentication state
        if turnkey.authState == .authenticated {
            // User is authenticated
        }
    }
}

Next steps

  • Move on to Authentication to learn how to authenticate users in your app.