
Configuring OAuth

Using OAuth requires a bit of configuration in the Turnkey Dashboard and your app configuration.

Enabling OAuth

Navigate to the Wallet Kit section in the Turnkey Dashboard and enable the OAuth. Note if you have not enabled the Auth Proxy, you will need to do so first. Check out the Getting Started guide for more details. OAuth providers configuration

Configuring OAuth providers

You must enable the OAuth providers you want to use in the Social logins section. OAuth client IDs configuration

Client IDs

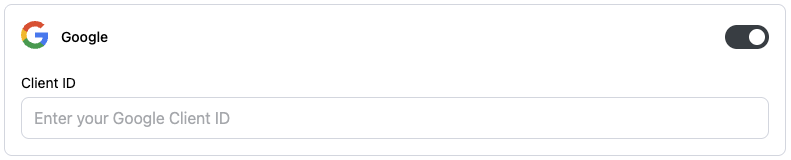
You can choose to enter your client IDs for each OAuth provider and the redirect url in the dashboard OAuth client IDs configuration OAuth redirect URL configuration Or, you can provide the client IDs and redirect URI through environment variables and pass them in the TurnkeyProvider’s config. This is useful if you want to use different OAuth client IDs or a different redirect URL for different environments (e.g., development, staging, production). You can retrieve the client IDs from the OAuth provider’s dashboard. Note that the redirect URI must match the one you configured in the dashboard or in the TurnkeyProvider config.
For OAuth2.0 providers, you will need to upload the client ID and secret in the dashboard. Check out the OAuth2.0 providers section for more details.

Client Configuration

If you choose to provide the client IDs and redirect URI through environment variables, you can do so in the TurnkeyProvider’s config.. Additionally, you must provide auth.oauth.appScheme in your app config in order to use the deep link completion for OAuth in React Native.
constants/turnkey.ts
import type { TurnkeyProviderConfig } from "@turnkey/react-native-wallet-kit";

export const TURNKEY_CONFIG: TurnkeyProviderConfig = {
  organizationId: process.env.EXPO_PUBLIC_ORGANIZATION_ID!,
  authProxyConfigId: process.env.EXPO_PUBLIC_AUTH_PROXY_CONFIG_ID!,
  auth: {
    oauth: {
      appScheme: "myapp", // Required for RN deep link completion
      // You can also provide these values through the Turnkey dashboard:
      // Note: If no redirect URI is provided, the default redirect URI will be used `https://oauth-redirect.turnkey.com`
      oauthRedirectUri: process.env.EXPO_PUBLIC_REDIRECT_URI || "", // Eg: "https://myapp.com/home". This must match the redirect URI configured in your OAuth provider's dashboard.

      // You will typically get these from the OAuth provider's dashboard. Eg: Google developer console.
      google: { clientId: process.env.EXPO_PUBLIC_GOOGLE_CLIENT_ID },
      apple: { clientId: process.env.EXPO_PUBLIC_APPLE_CLIENT_ID },
      facebook: { clientId: process.env.EXPO_PUBLIC_FACEBOOK_CLIENT_ID },
      x: { clientId: process.env.EXPO_PUBLIC_X_CLIENT_ID },
      discord: { clientId: process.env.EXPO_PUBLIC_DISCORD_CLIENT_ID },
    },
  },
};
Make sure your Expo app.json includes your deep link scheme:
app.json
{
  "expo": {
    "scheme": "myapp"
  }
}

Usage

In your app, call the corresponding helper for each provider from useTurnkey: handleGoogleOauth, handleAppleOauth, handleFacebookOauth, handleDiscordOauth, and handleXOauth.
app/index.tsx
import { useState } from "react";
import { Alert, Button, View } from "react-native";
import { useRouter } from "expo-router";
import { useTurnkey } from "@turnkey/react-native-wallet-kit";

export default function SocialLoginButtons() {
  const router = useRouter();
  const {
    handleGoogleOauth,
    handleAppleOauth,
    handleFacebookOauth,
    handleDiscordOauth,
    handleXOauth,
  } = useTurnkey();
  const [loading, setLoading] = useState(false);

  const wrap = (fn: () => Promise<void>) => async () => {
    try {
      setLoading(true);
      await fn();
      router.replace("/(main)");
    } catch (err) {
      Alert.alert("Error", String(err));
    } finally {
      setLoading(false);
    }
  };

  return (
    <View style={{ gap: 8 }}>
      <Button
        title="Continue with Google"
        onPress={wrap(handleGoogleOauth)}
        disabled={loading}
      />
      <Button
        title="Continue with Apple"
        onPress={wrap(handleAppleOauth)}
        disabled={loading}
      />
      <Button
        title="Continue with Facebook"
        onPress={wrap(handleFacebookOauth)}
        disabled={loading}
      />
      <Button
        title="Continue with Discord"
        onPress={wrap(handleDiscordOauth)}
        disabled={loading}
      />
      <Button
        title="Continue with X"
        onPress={wrap(handleXOauth)}
        disabled={loading}
      />
    </View>
  );
}

Provider details

Oauth providers

Google

Requirements:
  • Dashboard: enable Google in Wallet Kit → Authentication.
  • Client ID: use a Web client ID in the Google developer console and set it in the Dashboard or in the TurnkeyProvider’s config.
Usage:
const { handleGoogleOauth } = useTurnkey();
await handleGoogleOauth();

Apple

Requirements:
  • Turnkey Dashboard: enable Apple.
  • Client ID: set Apple Services ID in the Dashboard or in the TurnkeyProvider’s config.
  • Provider Dashboard: Set the Redirect URI to myapp://
Usage:
const { handleAppleOauth } = useTurnkey();
await handleAppleOauth();

Facebook

Requirements:
  • Turnkey Dashboard: enable Facebook.
  • Client ID: set in Dashboard or in the TurnkeyProvider’s config.
  • Provider Dashboard: Set the Redirect URI to myapp://
Usage:
const { handleFacebookOauth } = useTurnkey();
await handleFacebookOauth();

OAuth2.0 providers

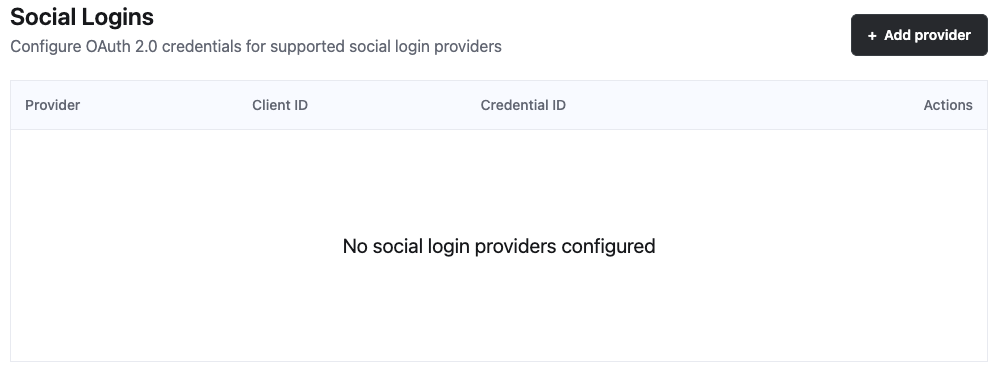
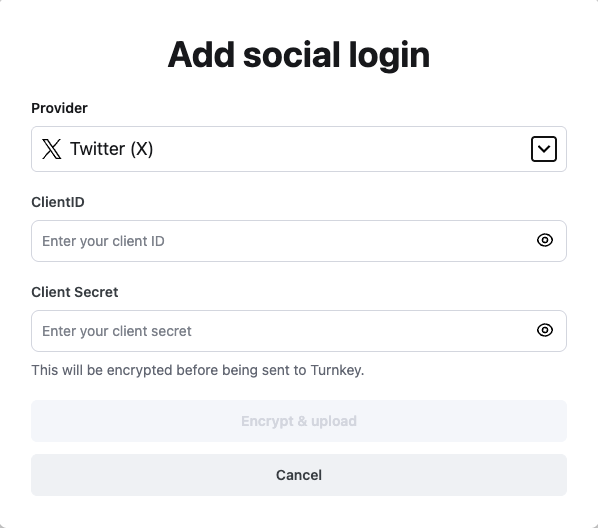
For OAuth providers that exclusively use OAuth2.0 (e.g., X, Discord), you will need to configure a few additional settings in your Turnkey Dashboard. In the Wallet Kit section of the dashboard, head to the Socials tab and click Add provider. OAuth2.0 providers configuration Select the provider you want to add from the dropdown, and fill in the required fields. You can find these values in the provider’s developer console. 
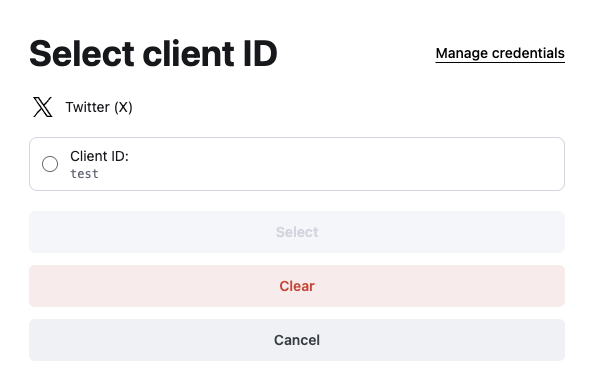
Any secrets will automatically be encrypted before uploading to Turnkey. Adding an OAuth2.0 provider Once you’ve added the provider, head back to the Authentication tab, and enable the provider you just added under the SDK Configuration section. Enabling an OAuth2.0 provider Click Select to choose your newly added client ID, then click Save Settings. You can also simply enter the client ID in the TurnkeyProvider’s config as shown above. Selecting an OAuth2.0 provider

Discord

Requirements:
  • Turnkey Dashboard: enable Discord (OAuth 2.0 provider).
  • Client ID: set in Dashboard or in the TurnkeyProvider’s config.
  • Provider Dashboard: Set the Redirect URI to myapp://
Usage:
const { handleDiscordOauth } = useTurnkey();
await handleDiscordOauth();

X (Twitter)

Requirements:
  • Turnkey Dashboard: enable X (OAuth 2.0 provider).
  • Client ID: set in Dashboard or in the TurnkeyProvider’s config.
  • Provider Dashboard: Set the Redirect URI to myapp://
Usage:
const { handleXOauth } = useTurnkey();
await handleXOauth();
I