Explore the live demo
The fastest way to see Turnkey embedded wallets in action. Our live demo app is a fully functional embedded wallet built with the Wallet Kit. Use it to try out authentication flows, wallet creation, transaction signing, and more, all from your browser with no setup.Clone and customize
If you want to get running locally, clone one of the demo apps below and start customizing. Each is a complete, runnable application you can use as a starting point for your own integration.Web
Demo embedded wallet (code)
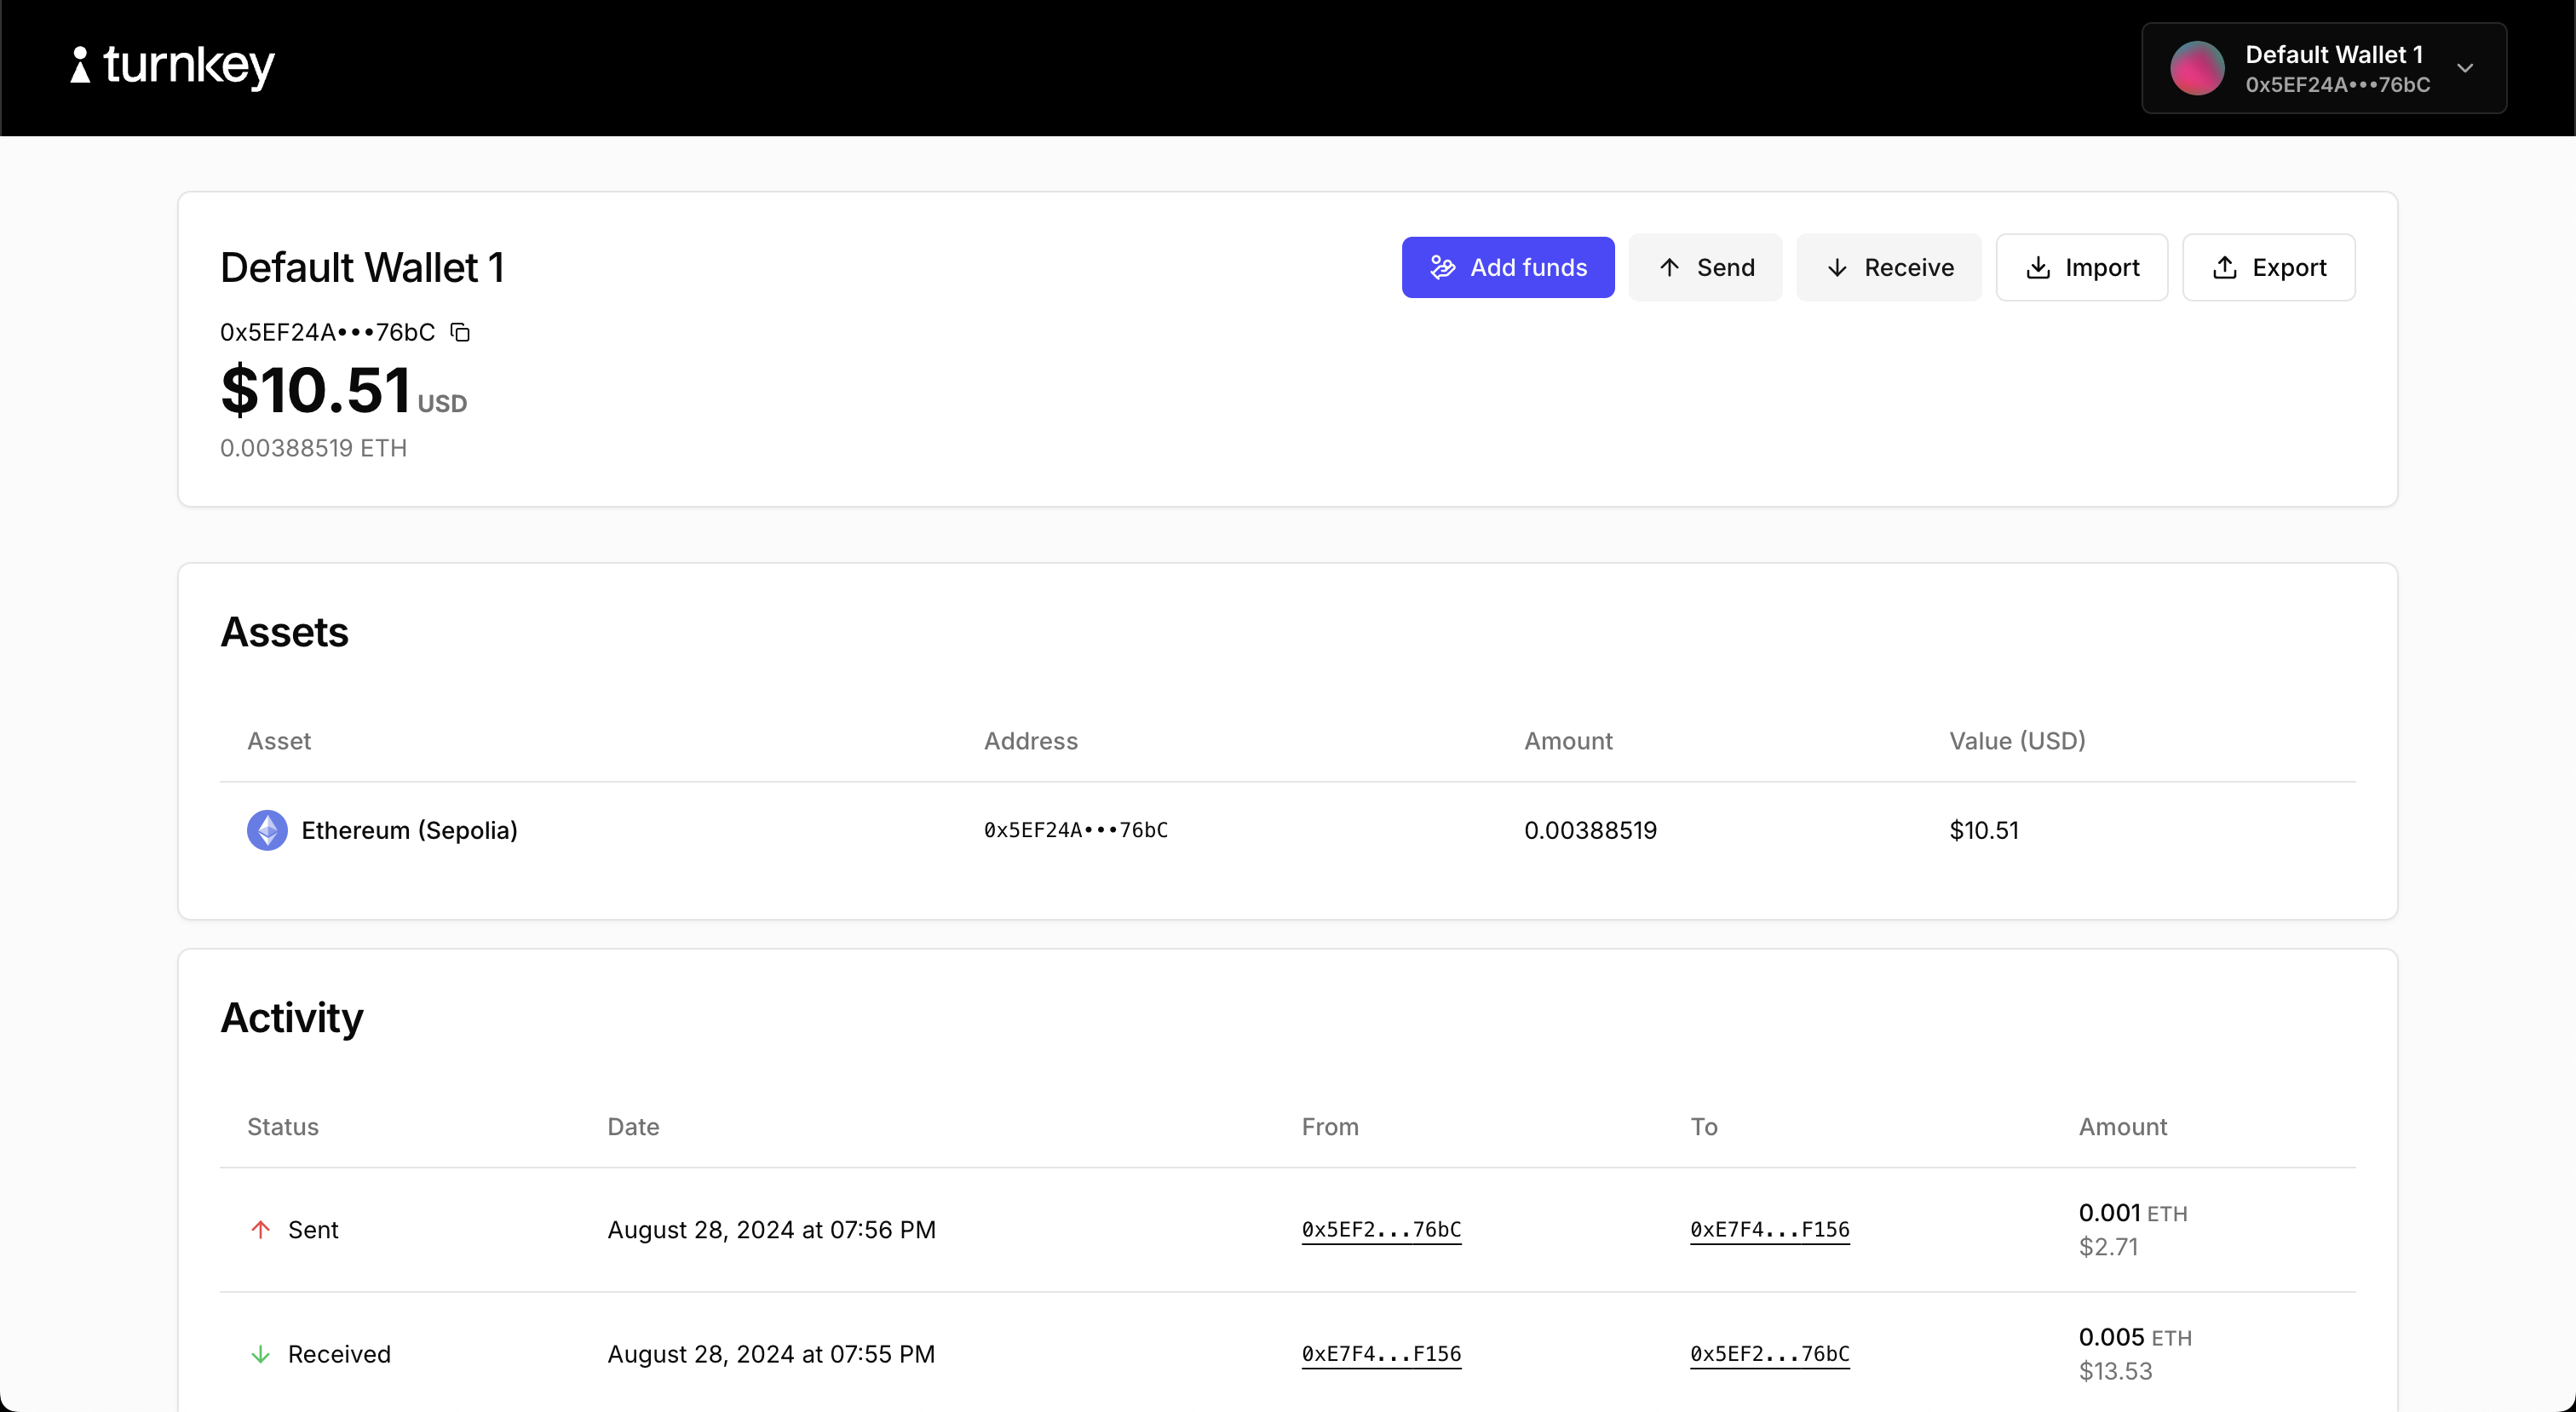
The flagship embedded wallet demo. Built with@turnkey/react-wallet-kit. Covers the full embedded
wallet lifecycle:
- Authentication via passkeys, email OTP, and OAuth
- Creating wallets and wallet accounts
- Sending and receiving funds
- Importing and exporting wallets
- Adding credentials

Mobile
React Native demo (code)
Demonstrates Turnkey’s JavaScript packages in a React Native environment. Covers authentication, wallet creation, export, and transaction signing.Flutter demo (code)
Demonstrates Turnkey’s Flutter packages. Covers authentication, wallet creation, export, and transaction signing.Build with the integration guide
Ready to integrate Turnkey into your own app? The Integration Guide walks you through everything step by step. For React apps, the Wallet Kit is the recommended starting point. It provides pre-built auth and wallet UI components, a hook-based API, and requires no backend setup. For React Native, Flutter, Swift, or Kotlin, choose the guide for your platform:React
Pre-built components with minimal configuration.
React Native
JavaScript packages for React Native.
Flutter
Dart SDK for Flutter apps.
Swift
Native iOS integration.
Kotlin
Native Android integration.