
Policy quickstart

This guide will help you add an additional user to your Turnkey organization and set permissions for that user through Policies. Specifically, we will create an API-only user with permissions to sign transactions to an allowlisted address.

This assumes that you previously completed the Sign a transaction guide, and thus have already set up:

  • Your Turnkey organization
  • An API key for the Root User
  • A Wallet with an Ethereum account

Create your new users

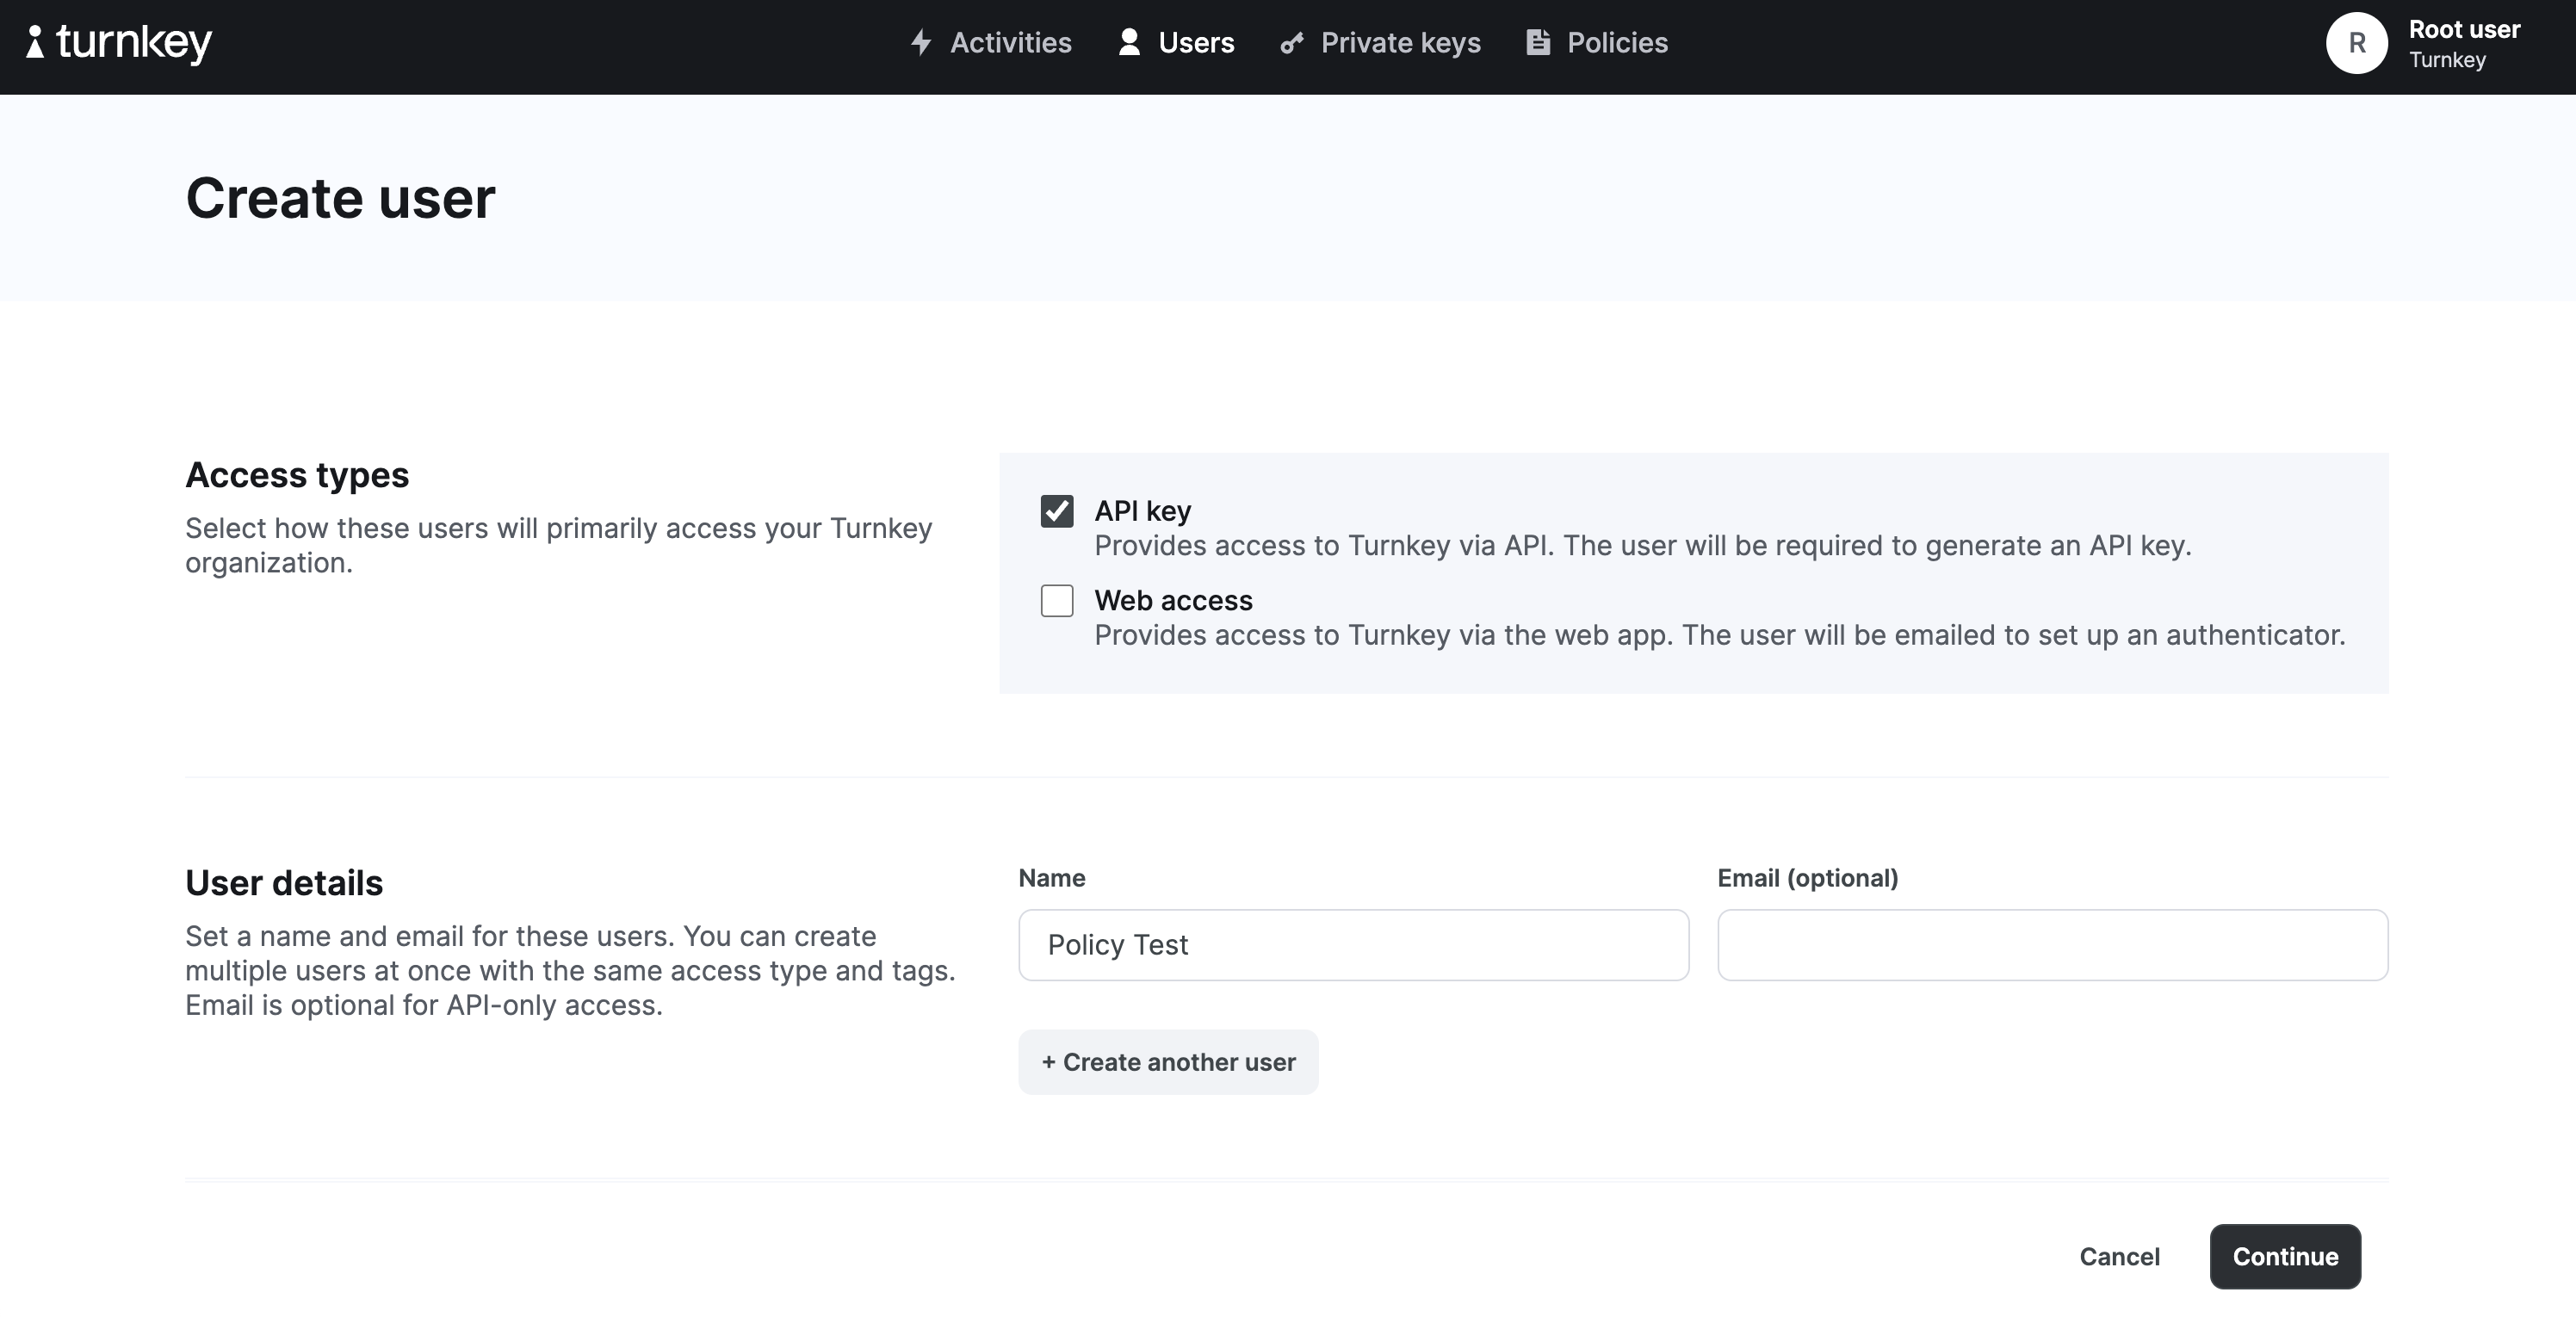
New users in your Turnkey organization can be created by navigating to the "Users" tab and clicking "Add User".

In the create user flow, you have the option to grant API key or web access to your new user. For this example, we're going to create an API-only user.

Under access types, select "API key". Enter the user name "Policy Test". This will be an API-only user, and therefore an email is not required. Click continue and create a new API key to associate with the user using the following command:

turnkey generate api-key --organization $ORGANIZATION_ID --key-name policy_test

This will create 2 files, "policy_test.public" and "policy_test.private". Copy the contents of the ".public" file and paste it into "API public key". Finish the create user flow and authenticate. Your new user will appear in the Users table. Note down the user ID as you will use it in the next step.

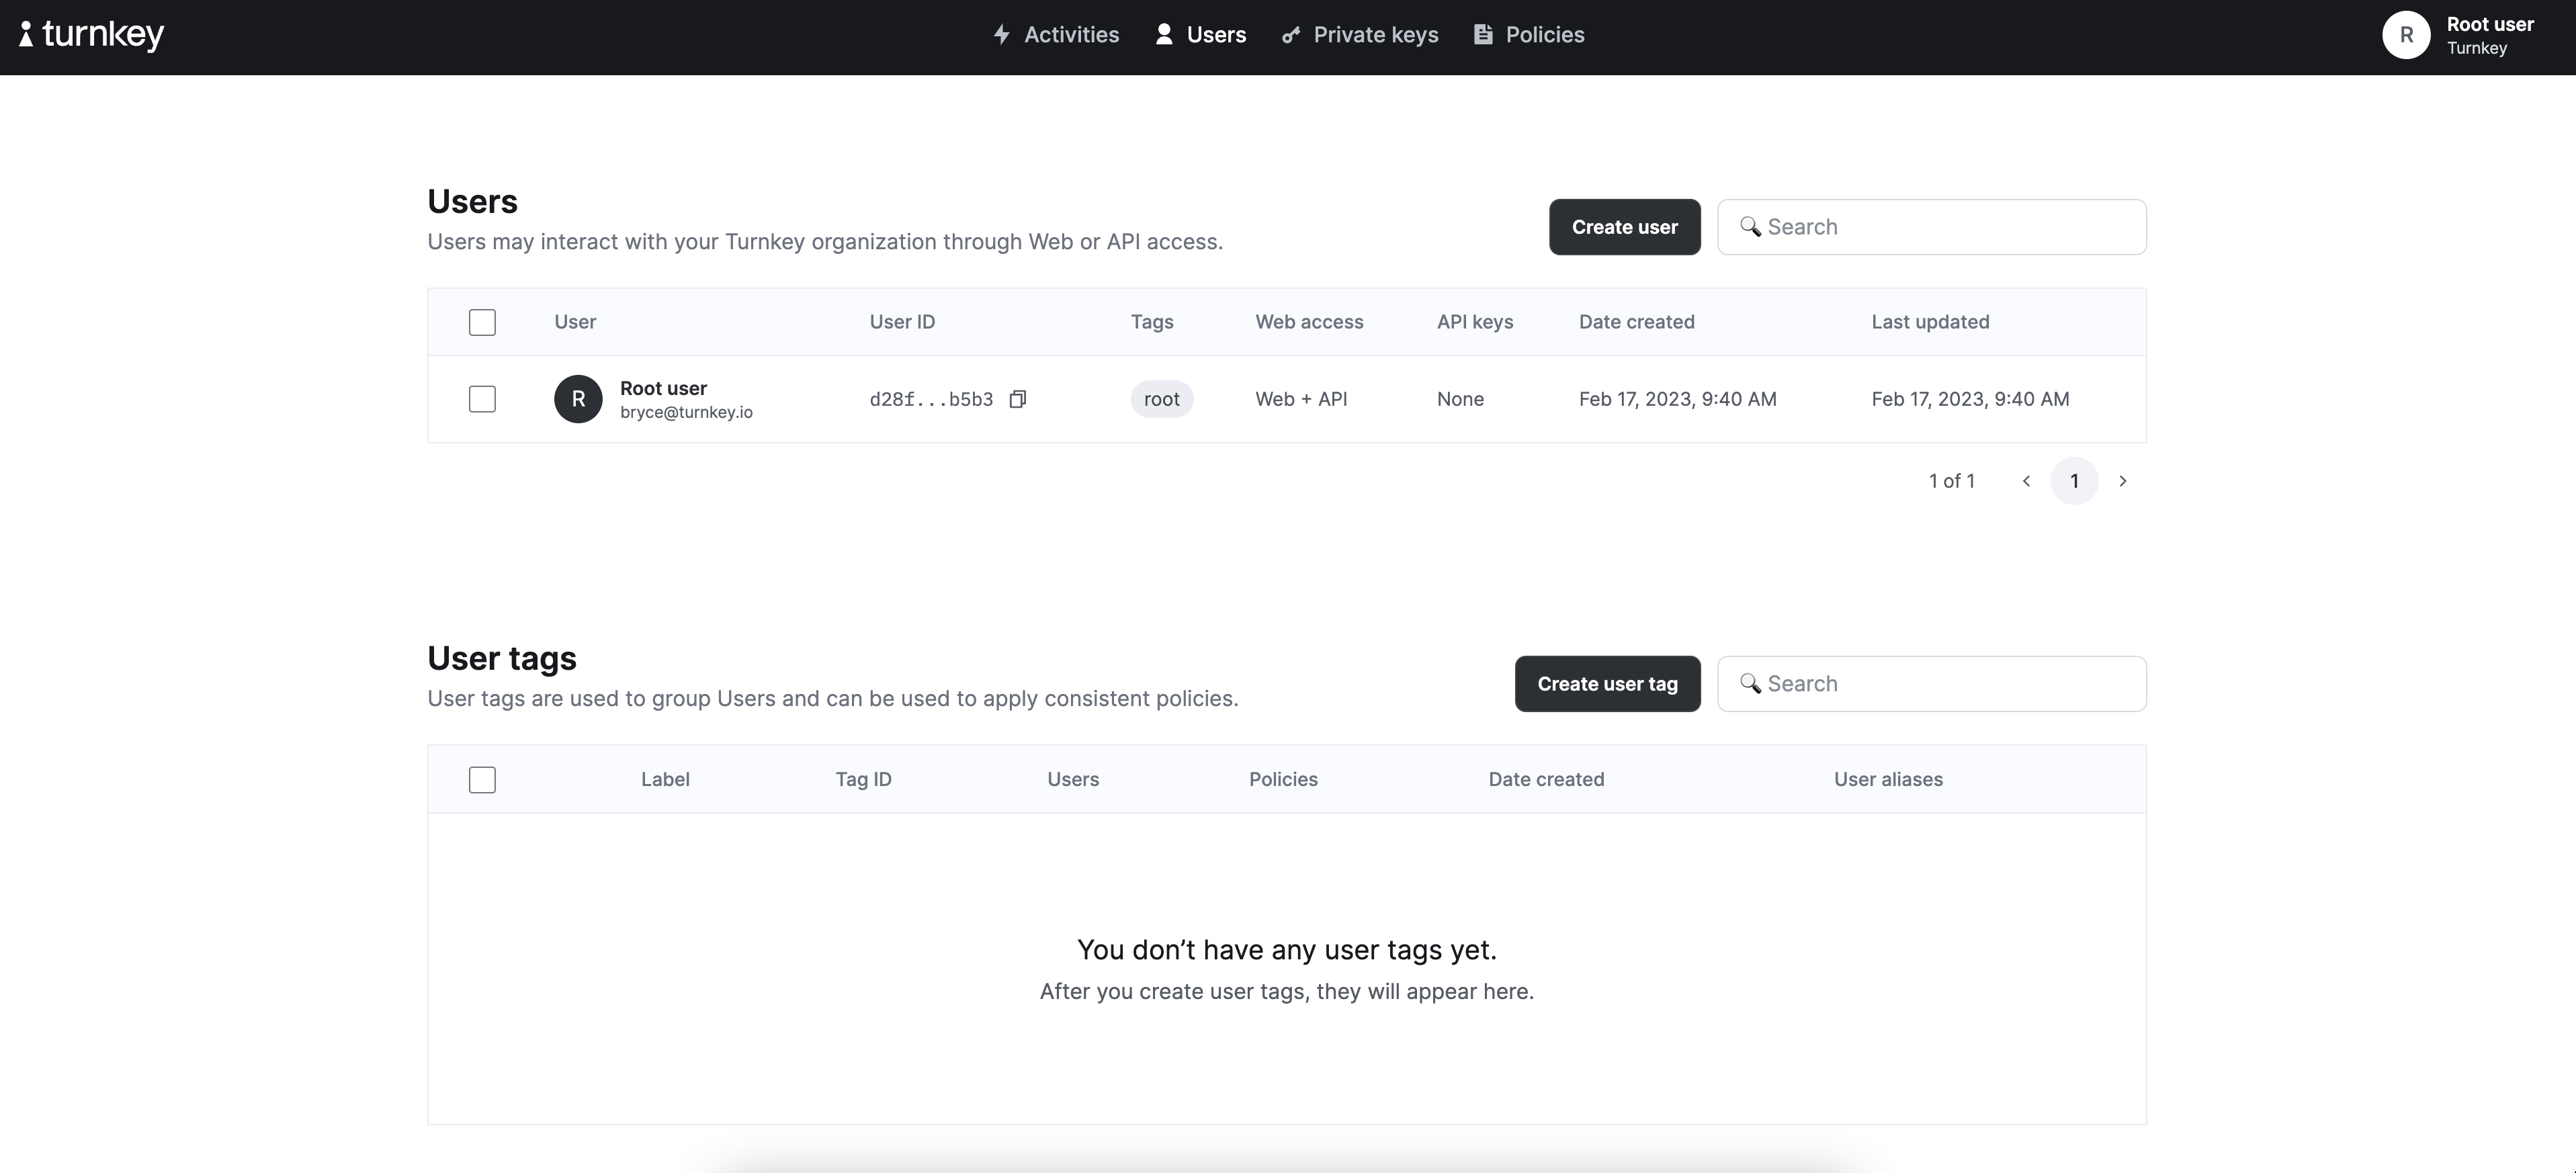
Create policies for your new users.

Next we will create a policy to grant permissions to the new user. Navigate to the "Policies" tab and click on "Add new policy".

Choose a name and note to describe your new policy. Next, enter the following policy, making sure to replace 
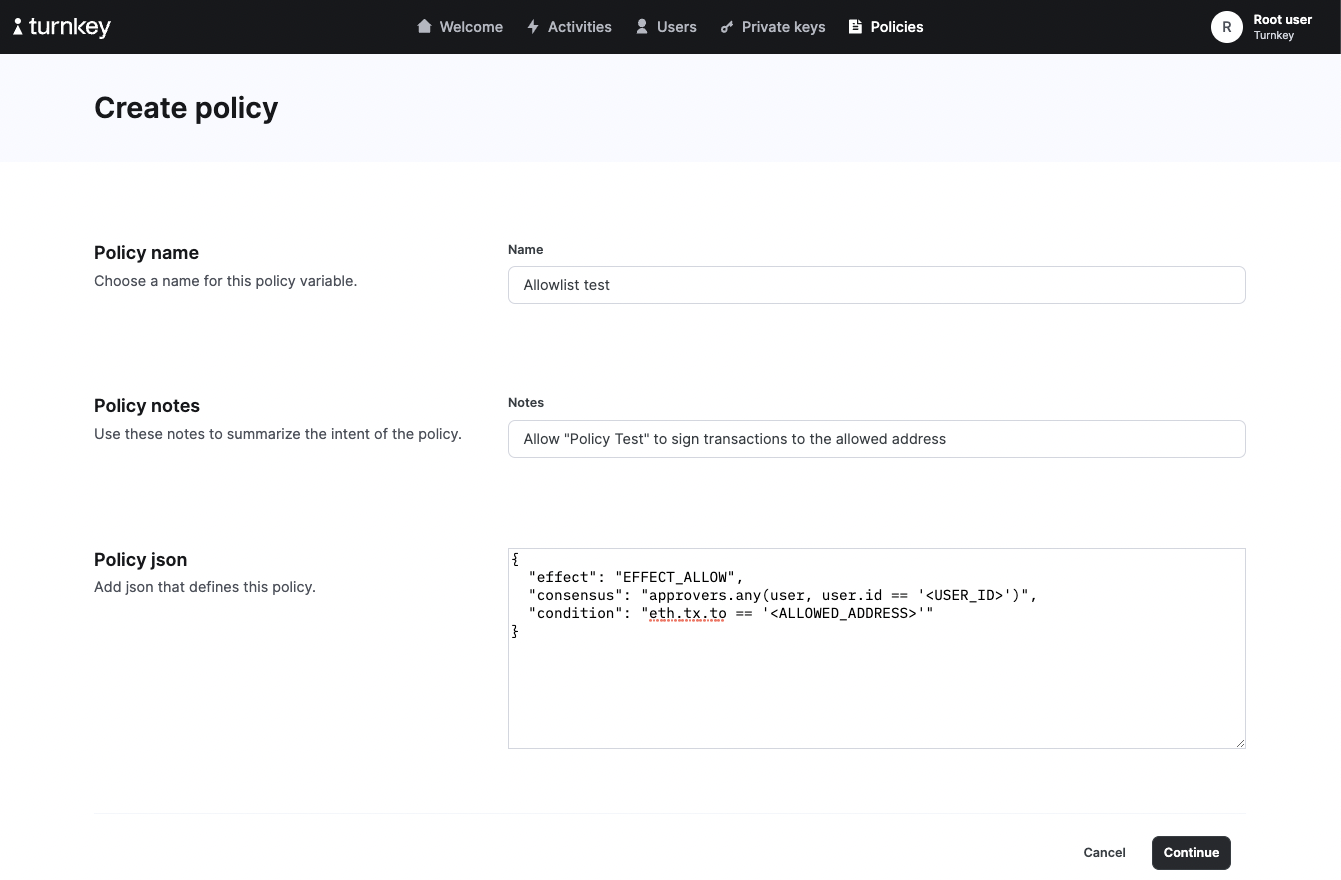
<ALLOWED_ADDRESS> with an Ethereum address of your choosing and <USER_ID> with the user ID of your recently created API user.

{
"effect": "EFFECT_ALLOW",
"consensus": "approvers.any(user, user.id == '<USER_ID>')",
"condition": "eth.tx.to == '<ALLOWED_ADDRESS>'"
}

Test your policies

Generate sample transactions using our transaction tool. You'll want to create two transactions: one transaction to the address you selected in your whitelist policy above, and one to any other address.

Next, try signing these two different transactions by replacing <YOUR_TRANSACTION> in the code snippet below. As a reminder, this guide assumes you've completed the Quickstart guide, and have set $ORGANIZATION_ID as an environment variable.

turnkey request --path /public/v1/submit/sign_transaction --body '{
"timestampMs": "'"$(date +%s)"'000",
"type": "ACTIVITY_TYPE_SIGN_TRANSACTION_V2",
"organizationId": "'"$ORGANIZATION_ID"'",
"parameters": {
"signWith": "<YOUR_ETH_ADDRESS>",
"type": "TRANSACTION_TYPE_ETHEREUM",
"unsignedTransaction": "<YOUR_TRANSACTION>"
}
}' --key-name policy_test

You'll see that the activity to allowlisted address comes back as COMPLETED, while the activity to the non-allowlisted address comes back as FAILED. You've successfully set your first policy!

Extra credit